Mail Merge Overview
Cloze is designed to let you communicate at scale with your real email while maintaining the one-to-one, personal touch of each relationship.
With Cloze's Mail Merge feature, you can email multiple people at once but in a personalized manner. Each recipient receives their own copy of the email with their own unique greeting.
Cloze Smart Templates lets you take this personalization a step further and customize each message uniquely for each recipient. Start by composing the base message you want to send to everyone, and then optionally you can personalize it for each contact.
- A personalized greeting is automatically included for each recipient.
- No one is BCC'd. Each person receives their own unique email. Each person will not see the other recipients.
Send a Mail Merge to Different Groups
Send a mail merge to everyone in an audience
Send a mail merge to everyone with a specific tag
There are two ways to send Mail Merge email with Cloze.
Please note that many email providers limit the number of emails you can send per day. For example, Google's G Suite limits you to 2,000 emails per day. Consumer Gmail accounts are limited to 500 emails per day. GoDaddy limits sending to 250 emails per day. Because of these email-provider sending limit restrictions, we support scheduled mail merge emails to 500 or fewer users.
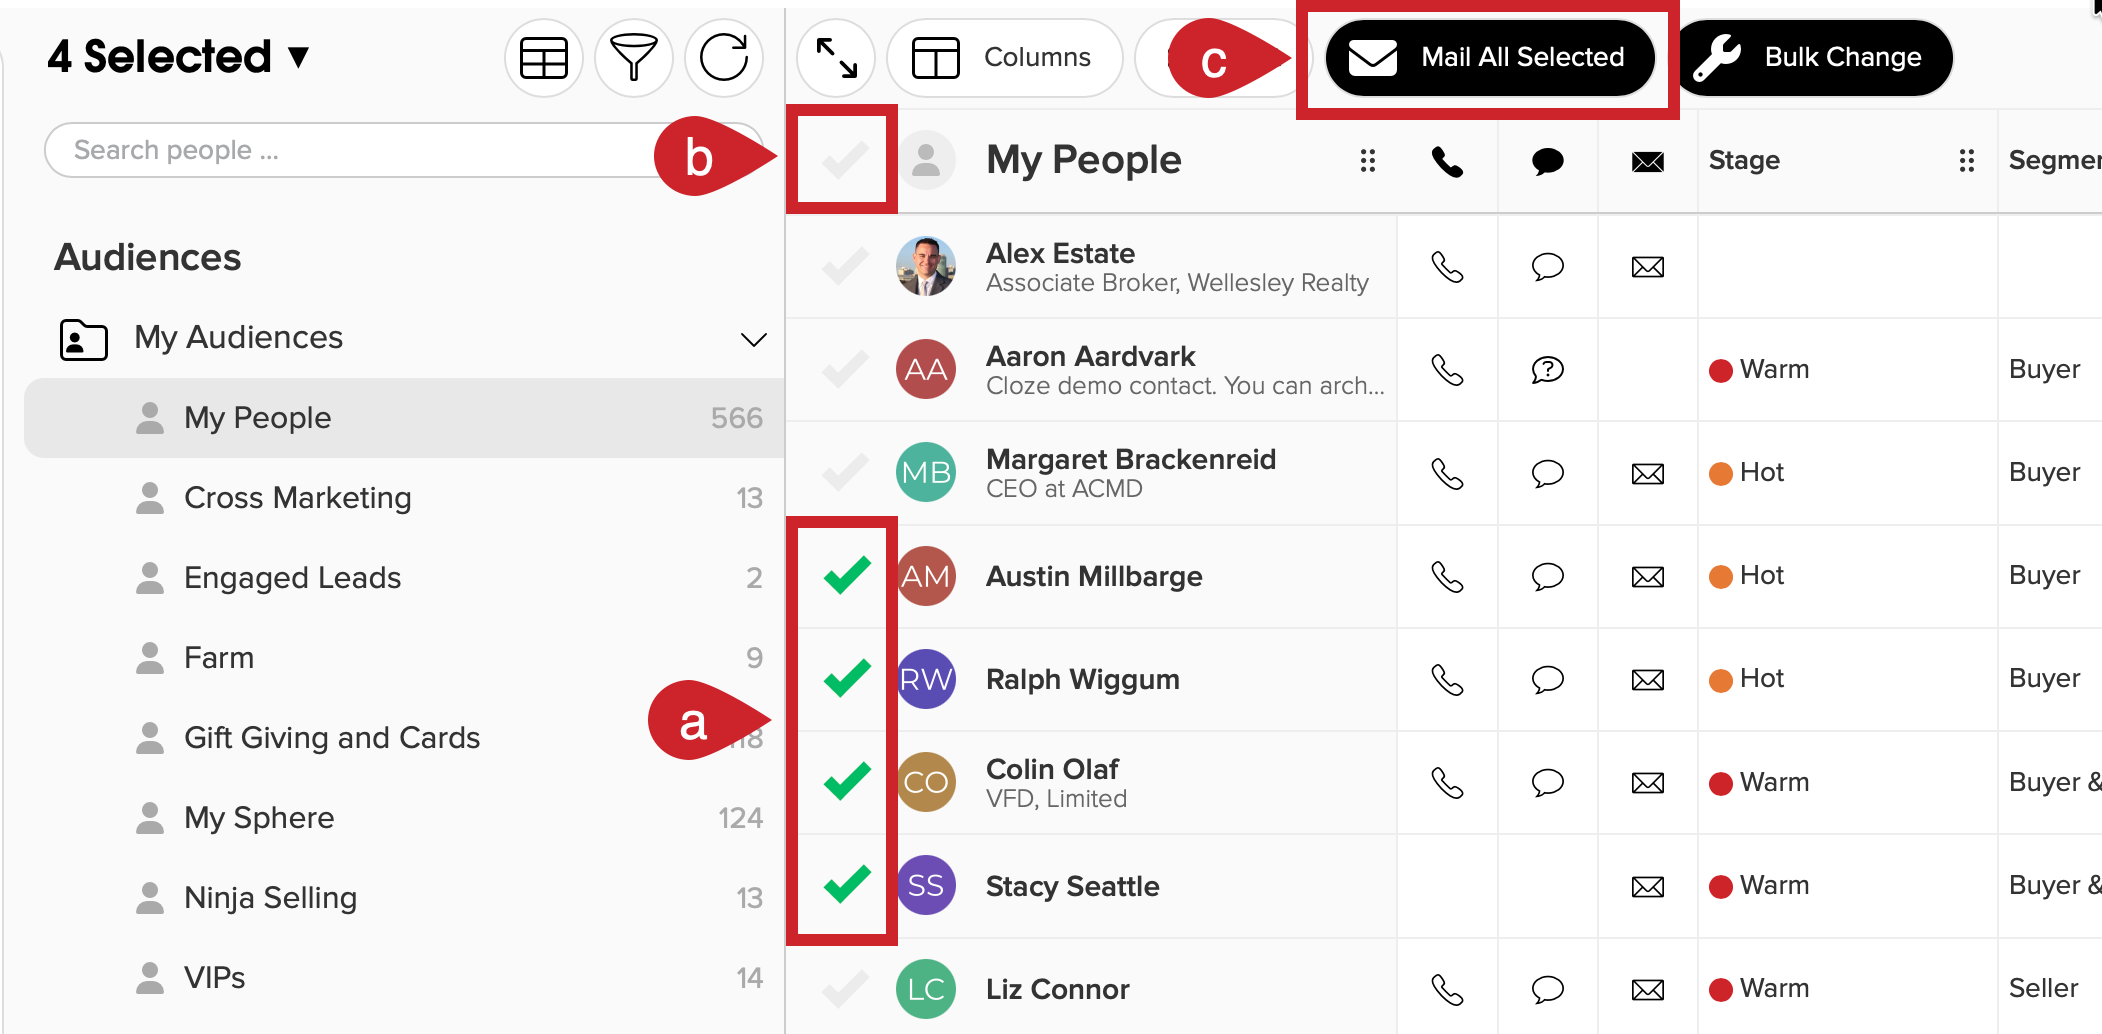
1.) In the People section, select the contacts you wish to email.
- Select the contacts you wish to email by tapping the checkmark next to each person
- If you want to select all, tap the checkmark at the top.
- Tap "Mail All Selected" at the top of the screen.
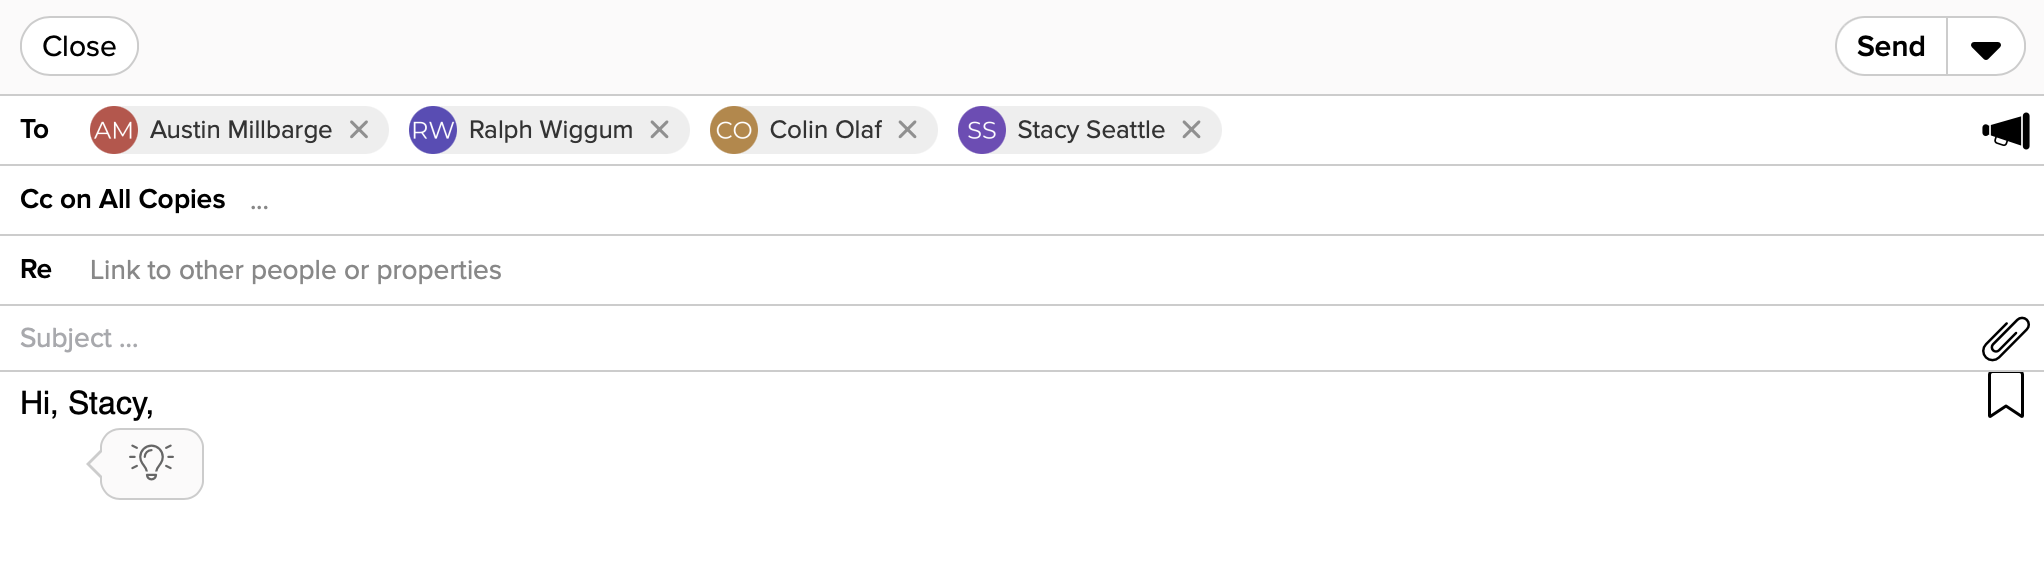
2.) The email composer will then show all of the people you have selected in the "To:" line.
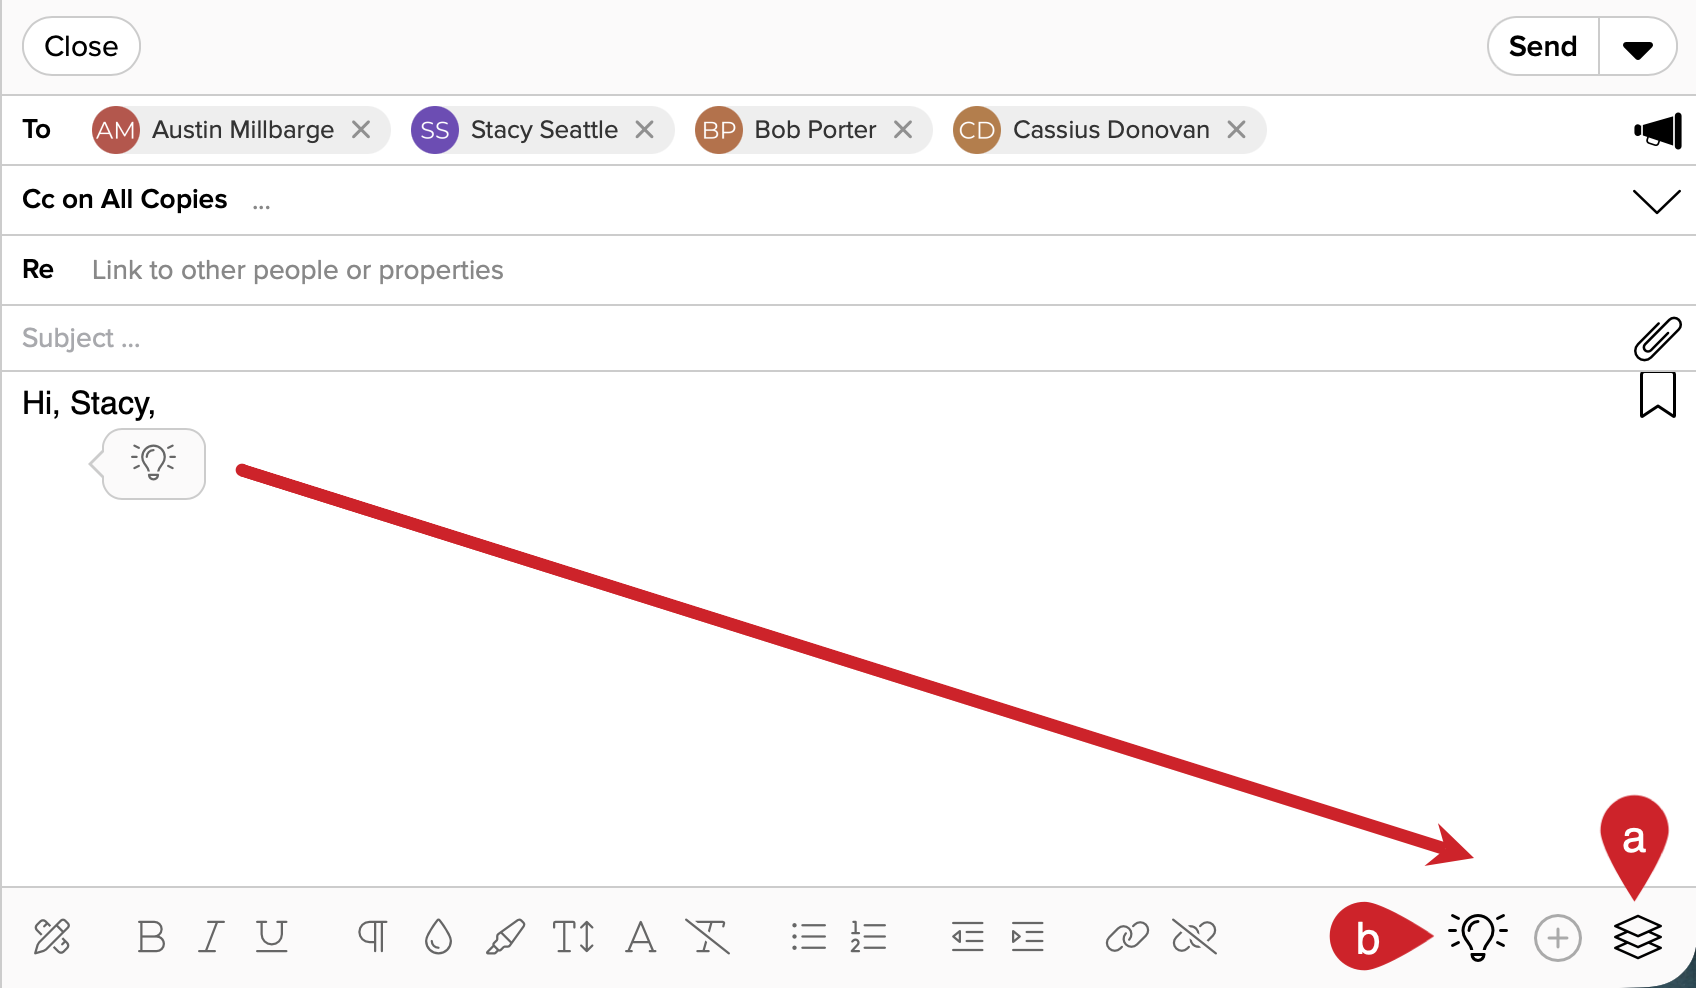
Note: The greeting ("Hi Dana") will rotate through each of the names from the people included in the "To:" line so you can see how it will look for each recipient before you send the email.
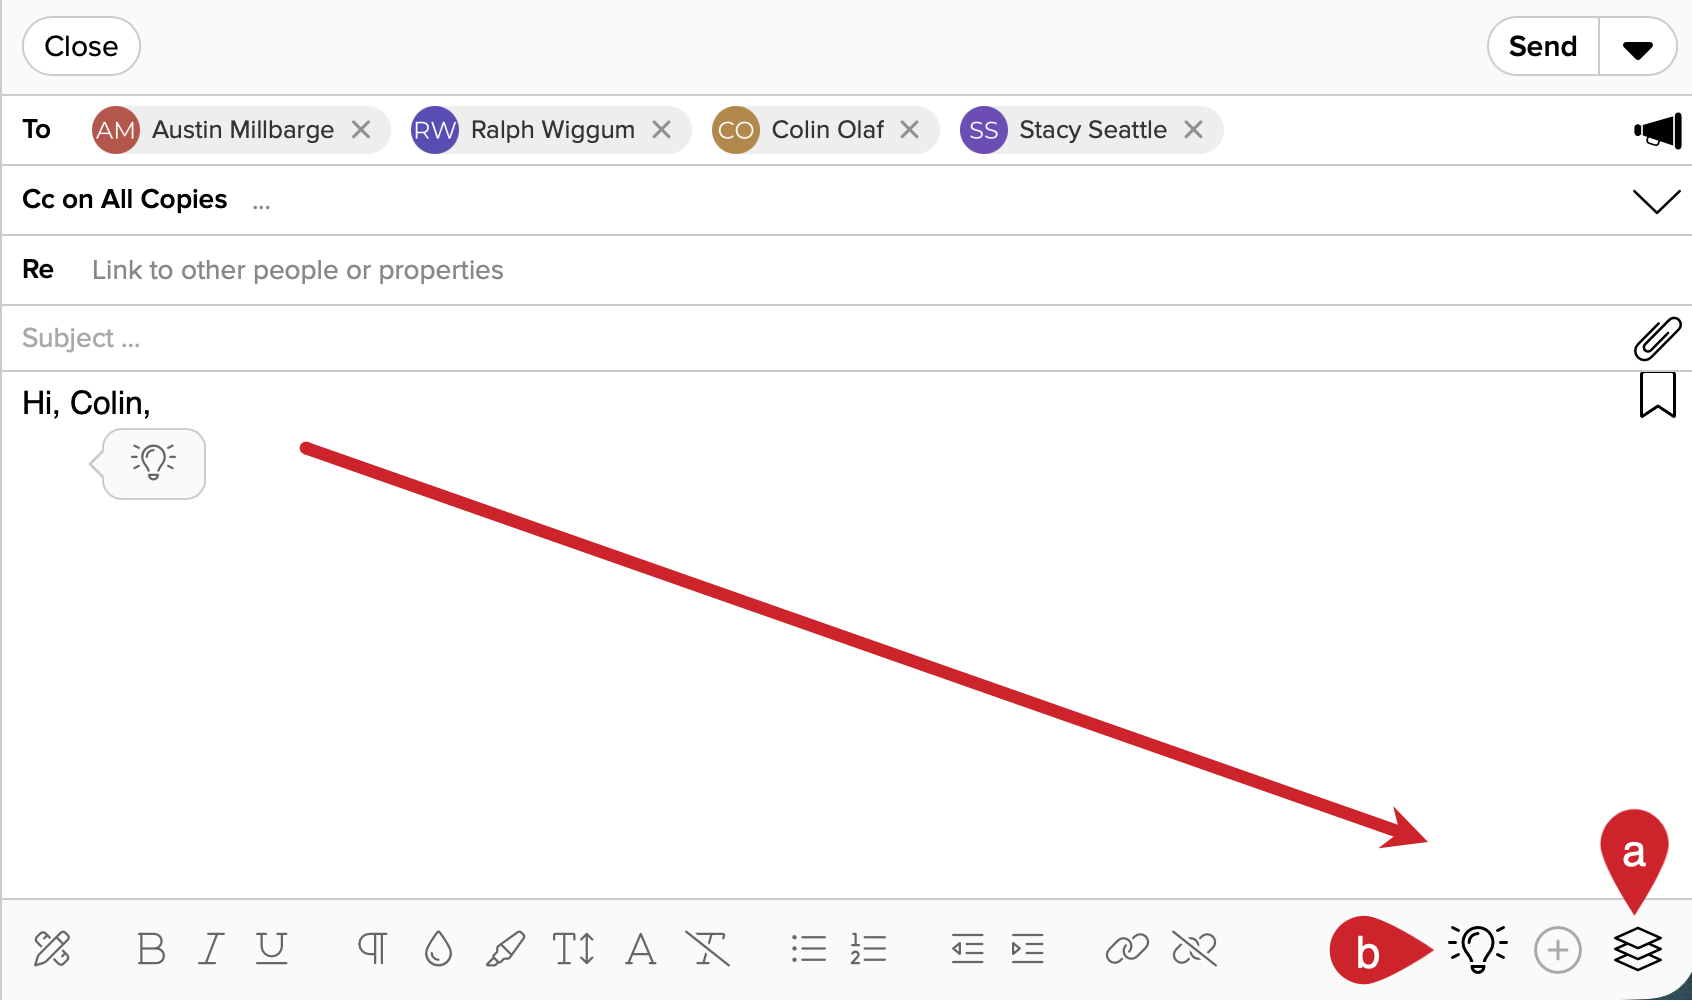
3.) Compose your email.
Tips: Use a template (a) or let Ghostwriter do the work (b).
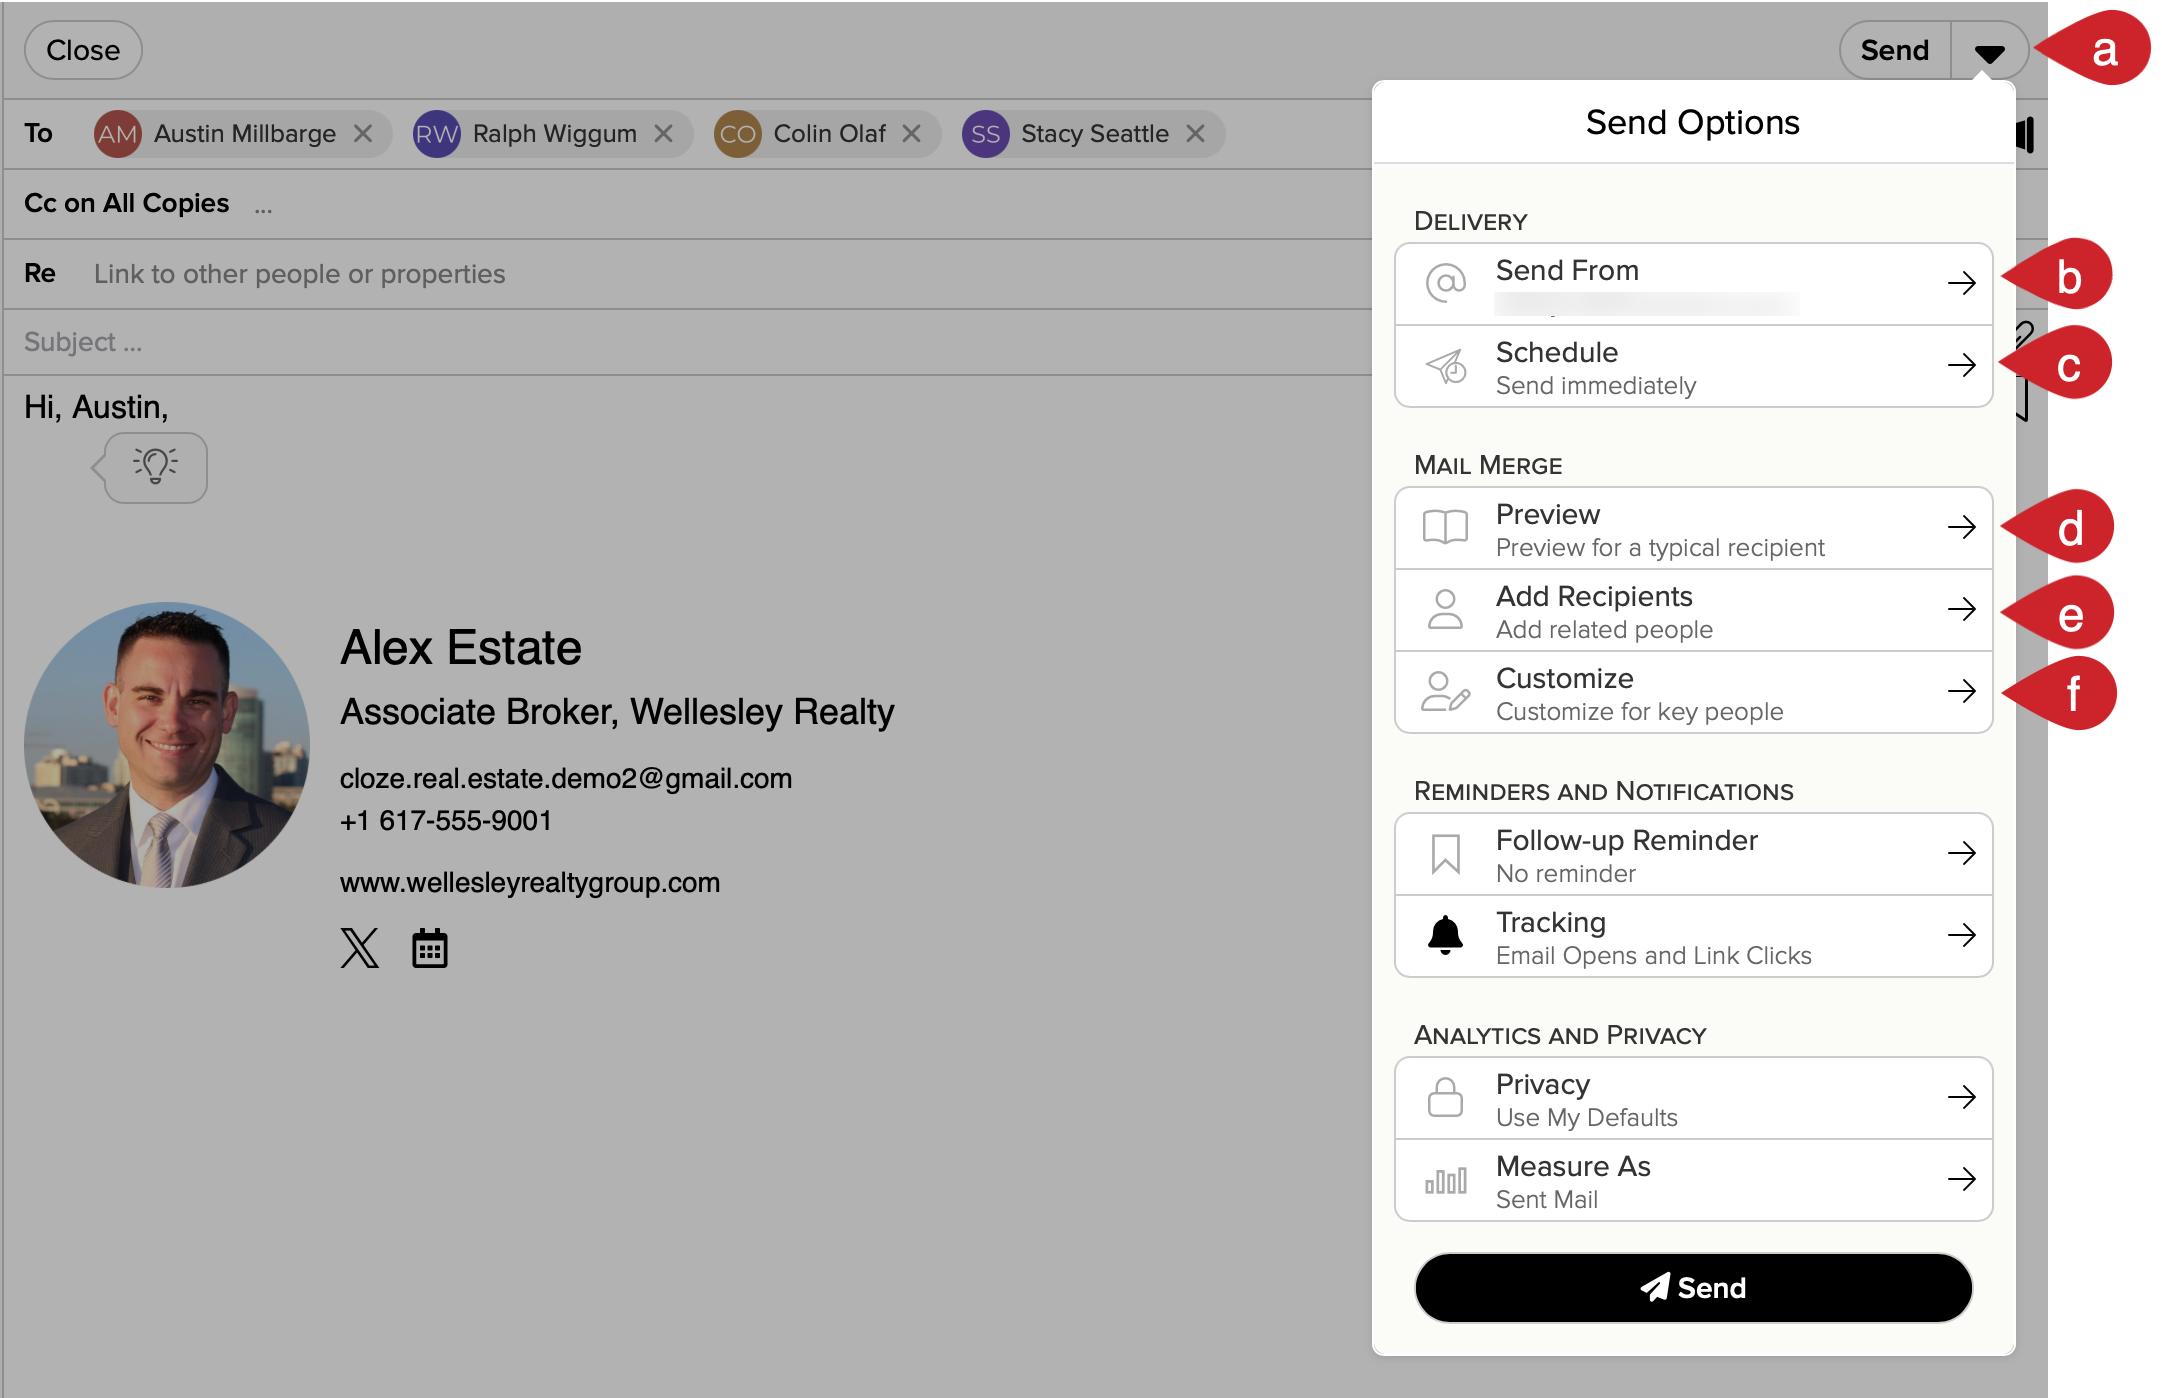
4.) Optionally, tap on the Send Options menu and select one of the options.
- Send - Tap on the Send Options menu.
- Send from - Change the email account you are using to send the mail merge from
- Schedule - Schedule the mail merge to be sent in the future.
- Preview - Preview the email for a typical recipient.
- Add Recipients - Add other related people like a spouse.
- Customize - Customize each message for key recipients.

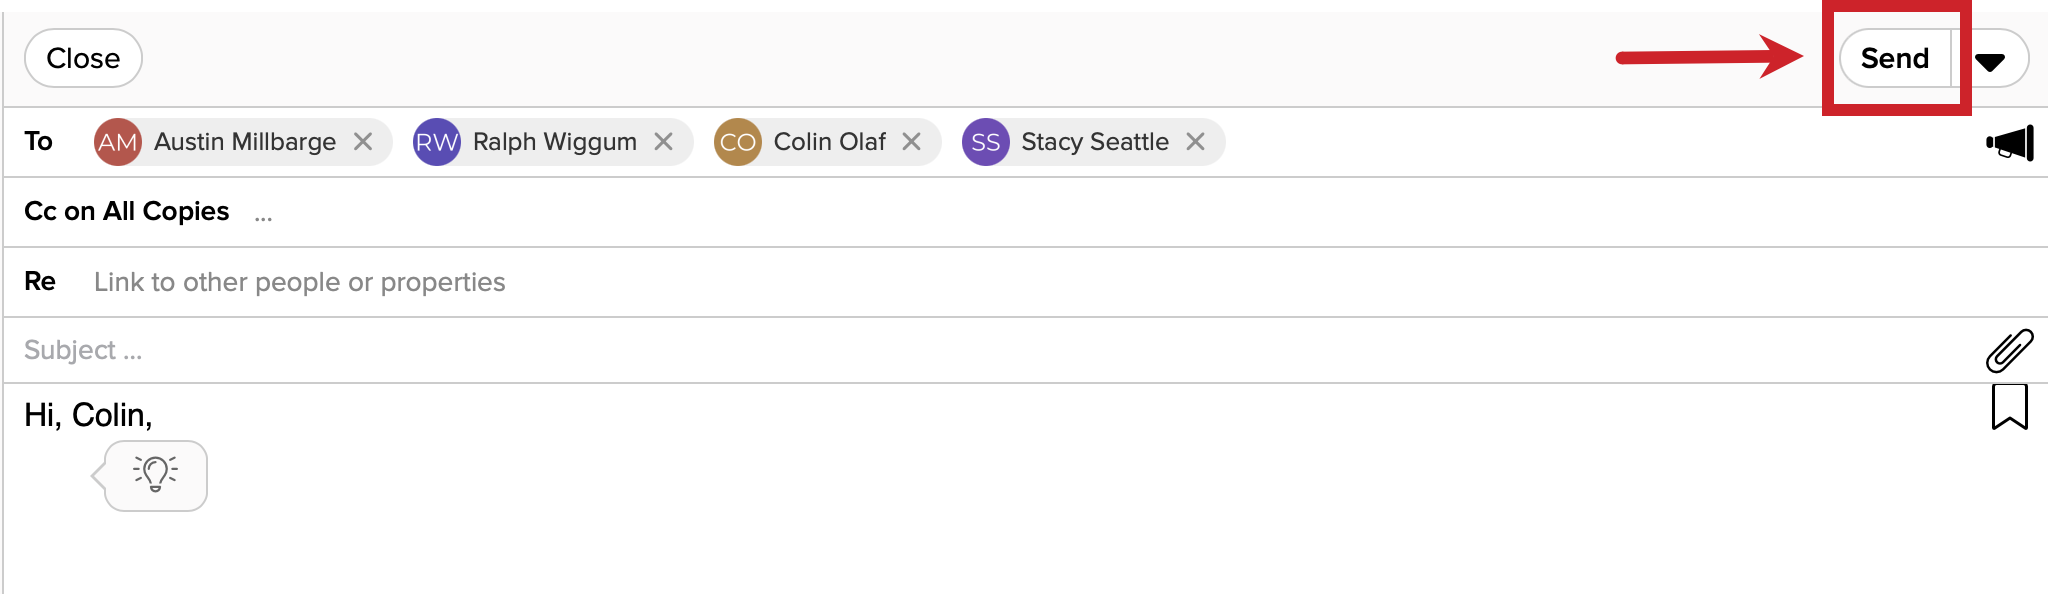
5.) Tap on the Send button to send your Mail Merge email.
From the Email Composer
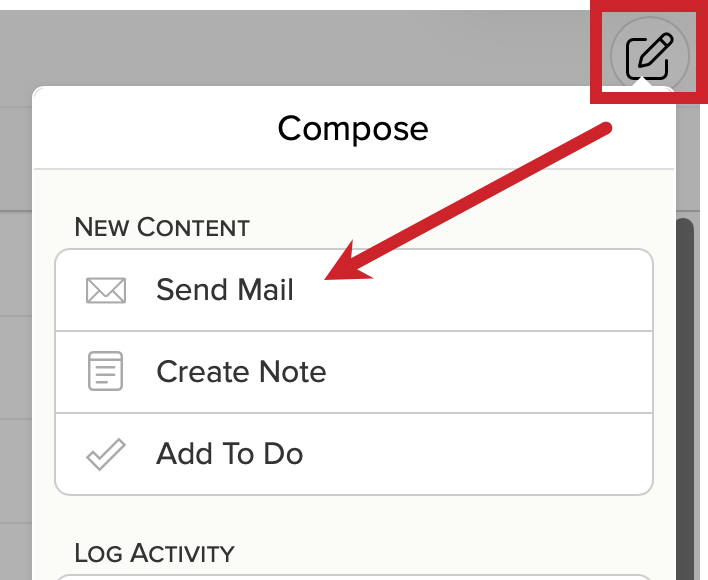
1.) Tap on the compose icon and select Send Mail.
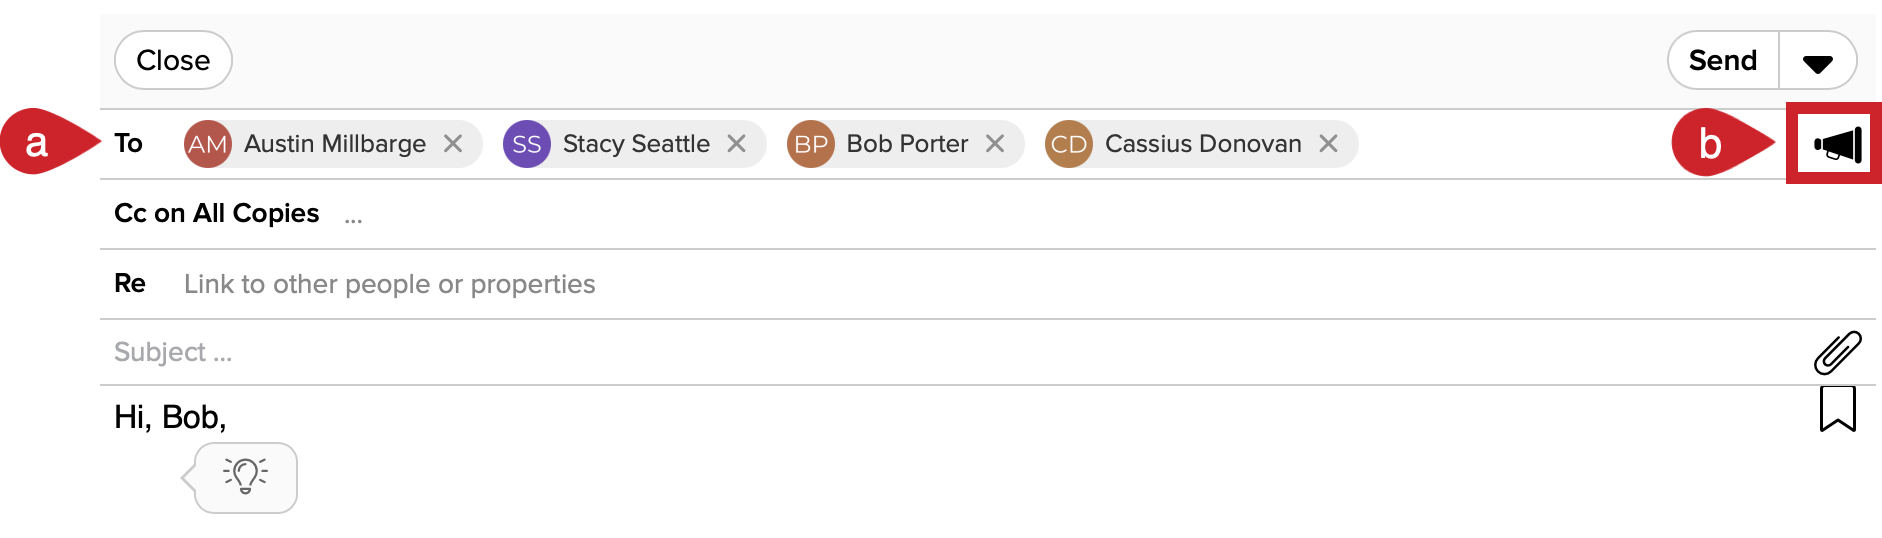
2.) Add contacts to the To line (a) and then tap on the megaphone icon towards the right of the screen (b), beneath the Send button. When the megaphone icon is filled in, this indicates you are sending a mail merge.
3.) Compose your email.
Tips: Use a template (a) or let Ghostwriter do the work (b).
4.) Optionally, tap on the Send Options menu and select one of the options.
- Send Options - Tap on the Send Options menu.
- Send from - Change the email account you are using to send the mail merge from
- Schedule - Schedule the mail merge to be sent in the future.
- Preview - Preview the email for a typical recipient.
- Add Recipients - Add other related people like a spouse.
- Customize - Customize each message for key recipients.
5.) Tap on the Send button to send your Mail Merge email.