How do I create a Policy?
Policies are a named set of related rights that can be enabled as a group.
Policies can be attached:
- To a role (in addition to it's regular rights you can say "and enable everything in the Marketing policy"). This is mostly just a way to make defining roles more meaningful, by composing a role out of policies instead of a long list of rights.
- Directly to a user. A user has a single role but can have one or more policies linked directly to them. This lets you give users a few extra rights without duplicating a whole set of roles.
Cloze does come with a set of standard policies that you can apply immediately.
Create the Policy
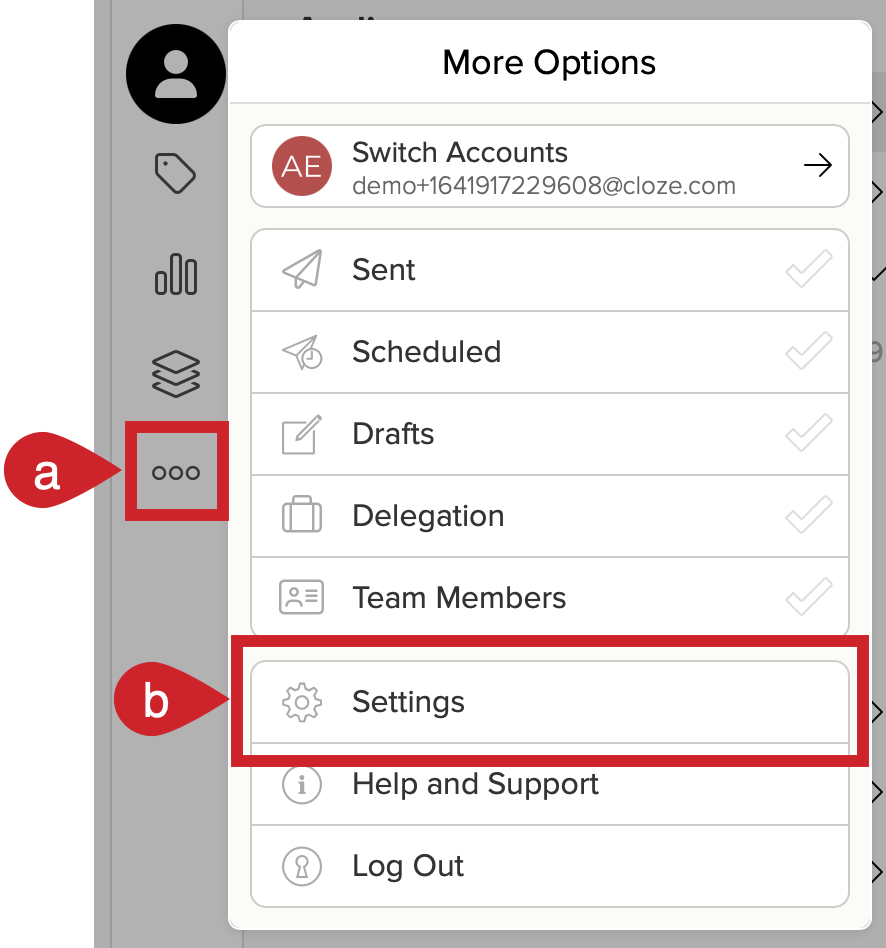
1.) In your Cloze account:
- Tap on More in the lower left on your computer (cloze.com).
- Select Settings.
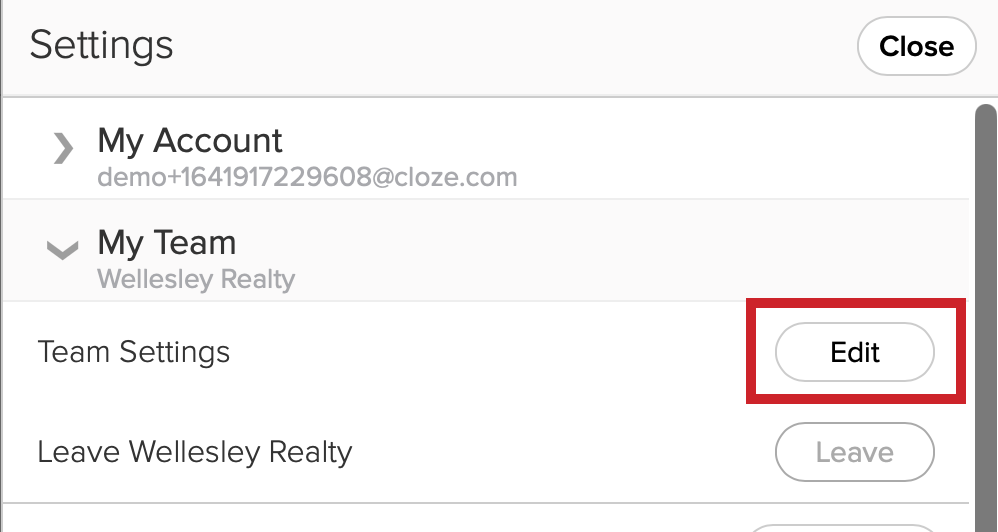
2.) Under My Team, next to Team Settings, tap on Edit.
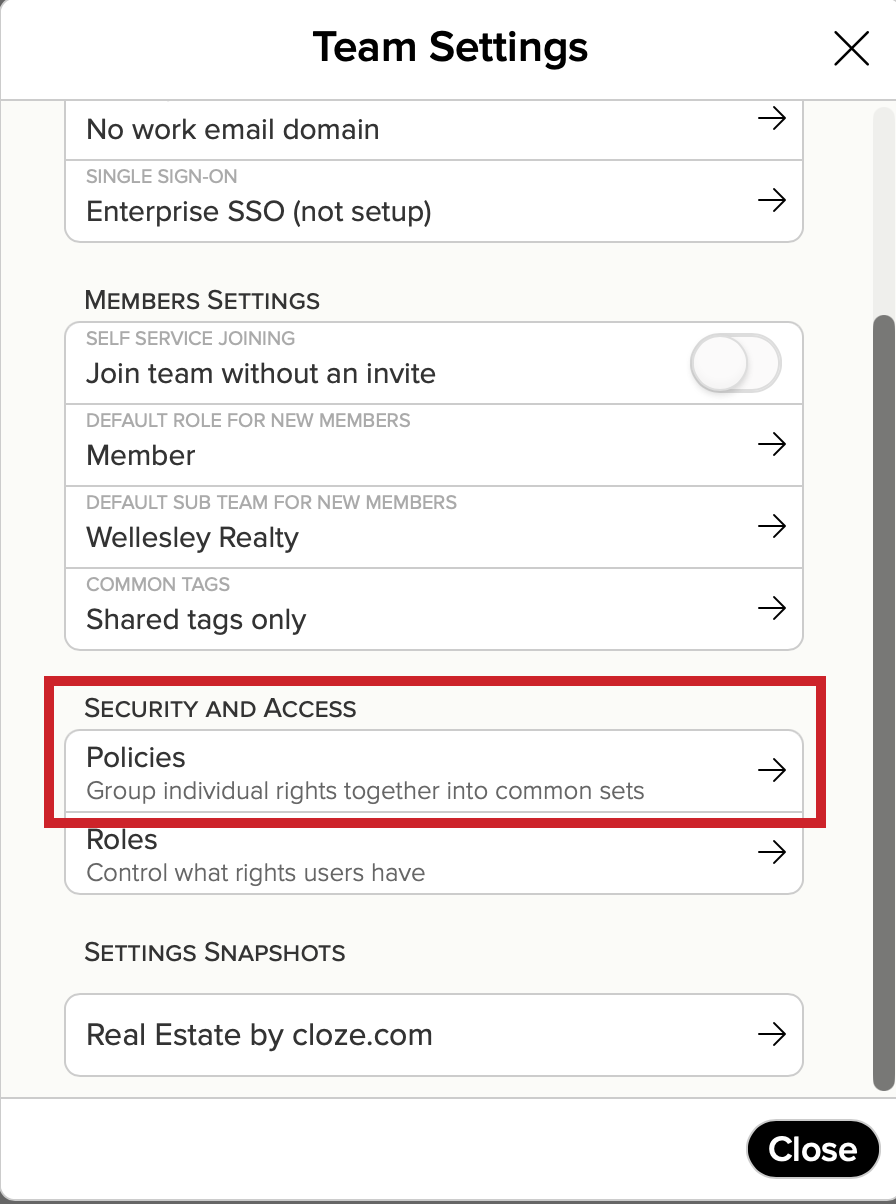
3.) Under the Security and Access section, tap on Policies.
4.) Tap on Add new policy.
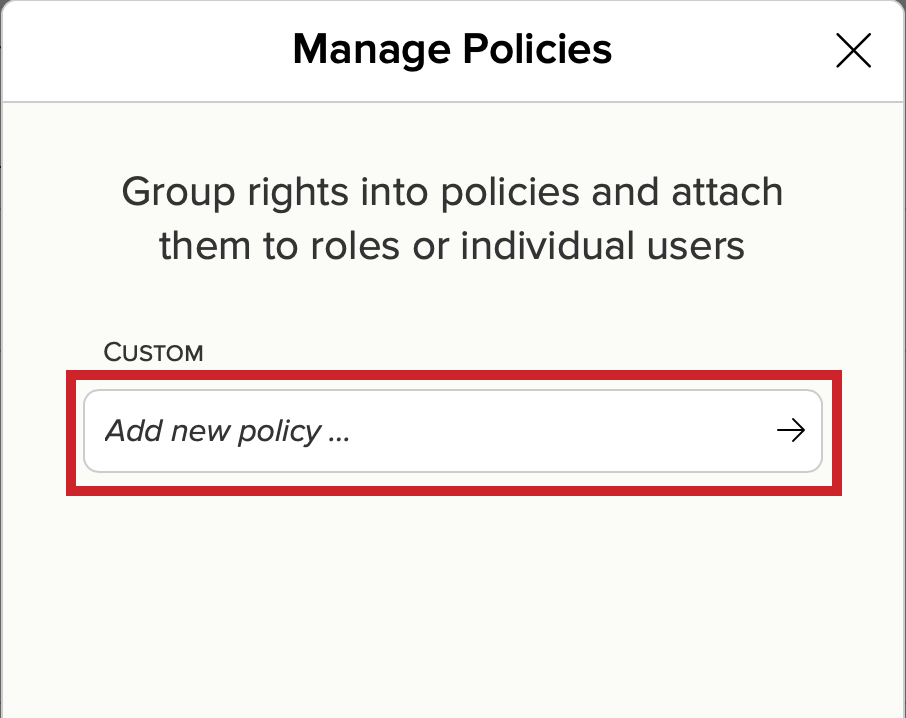
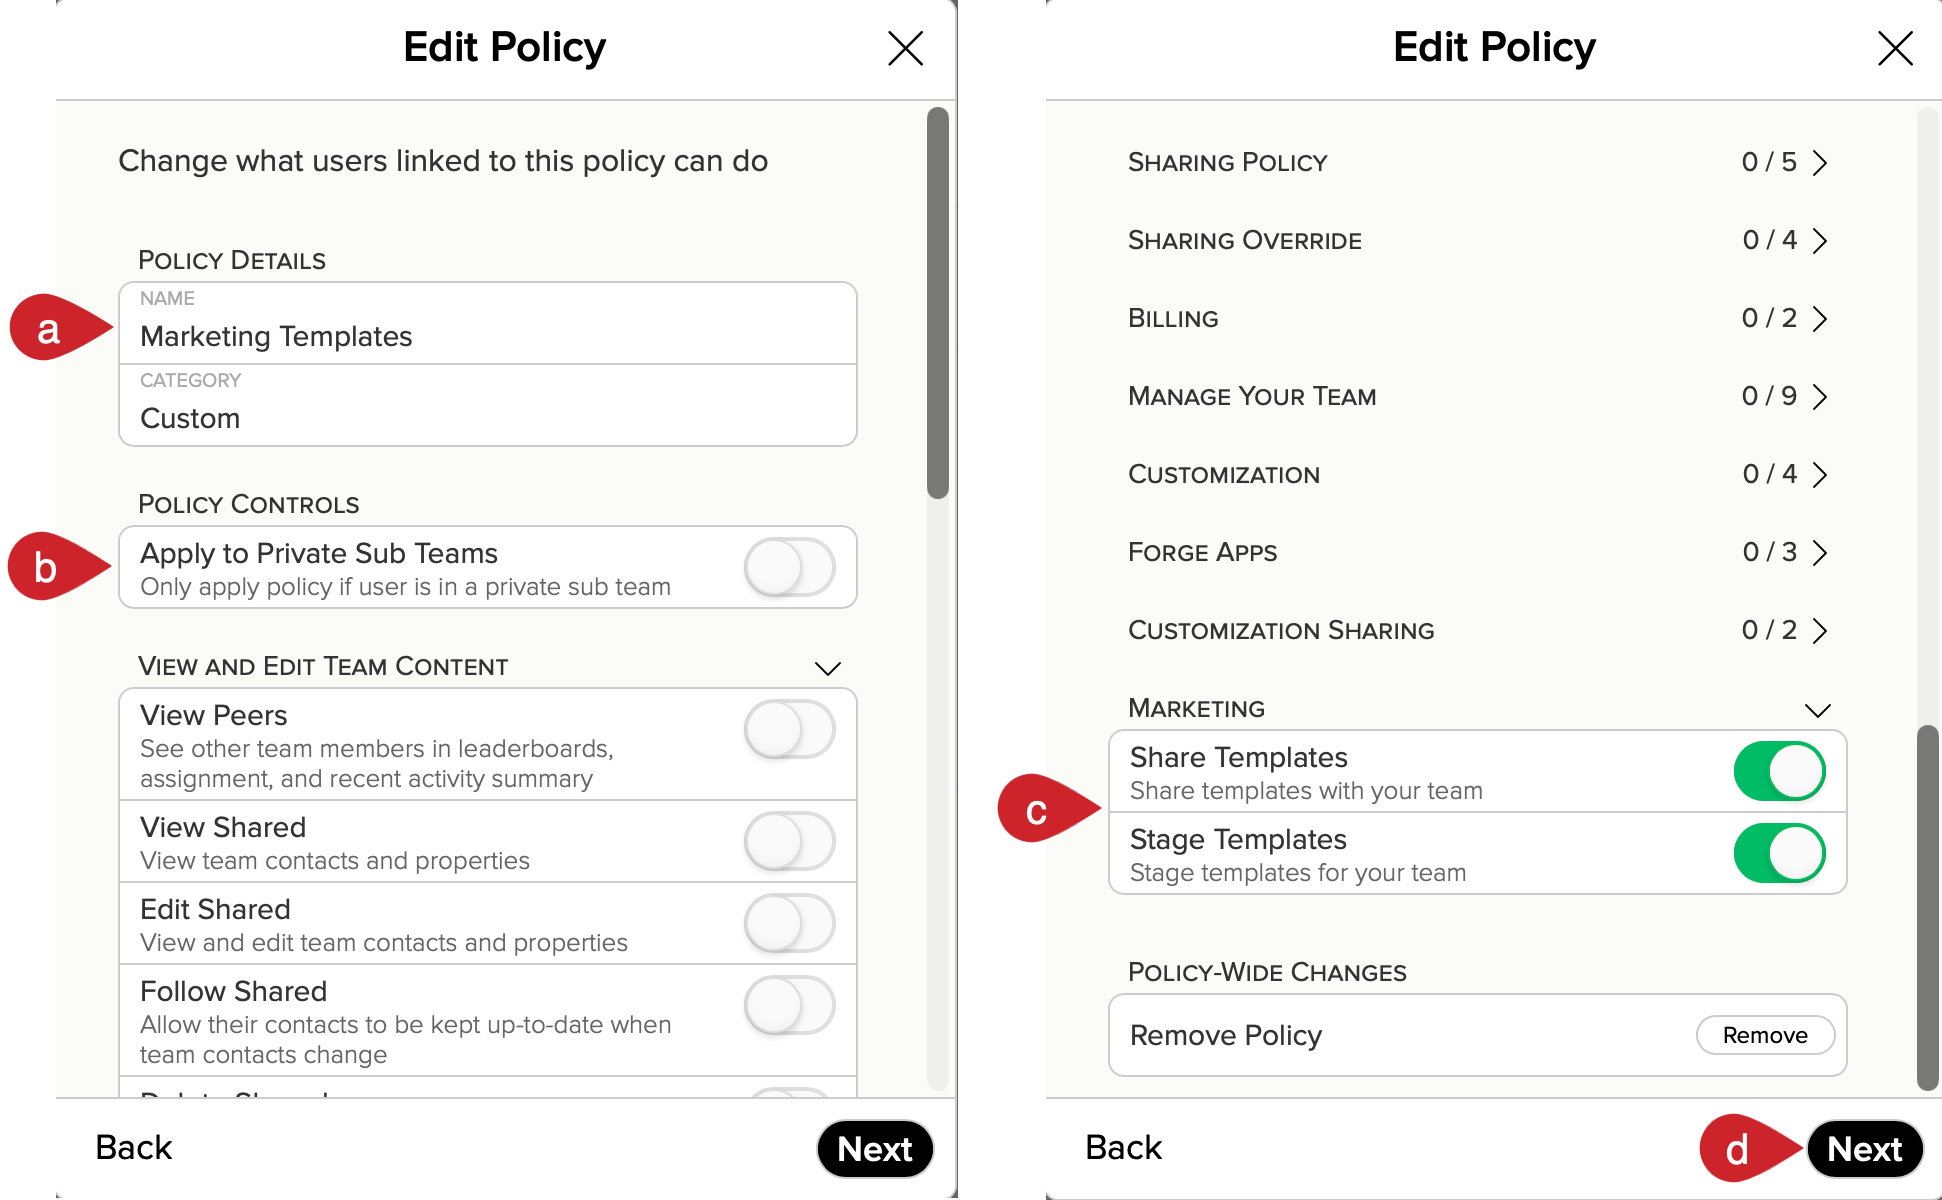
5.) Create the policy:
- Name your policy
- If the user is in a private sub team, this should be toggled ON
- Expand each heading and toggle on the rights you want to be included in the policy
- Tap on Next after enabling the rights you want for the policy
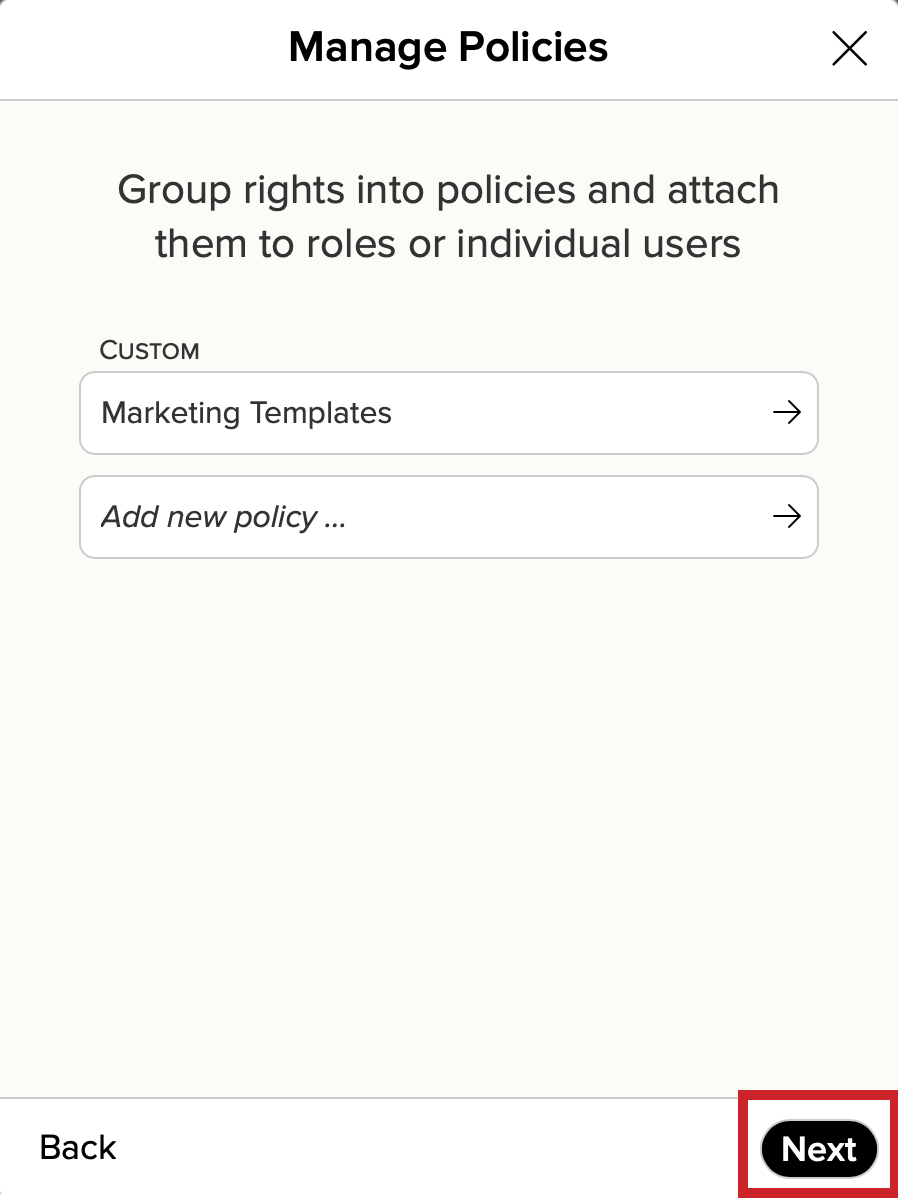
6.) You will see the policy you have just created. Tap on Next once more to save the Policy.
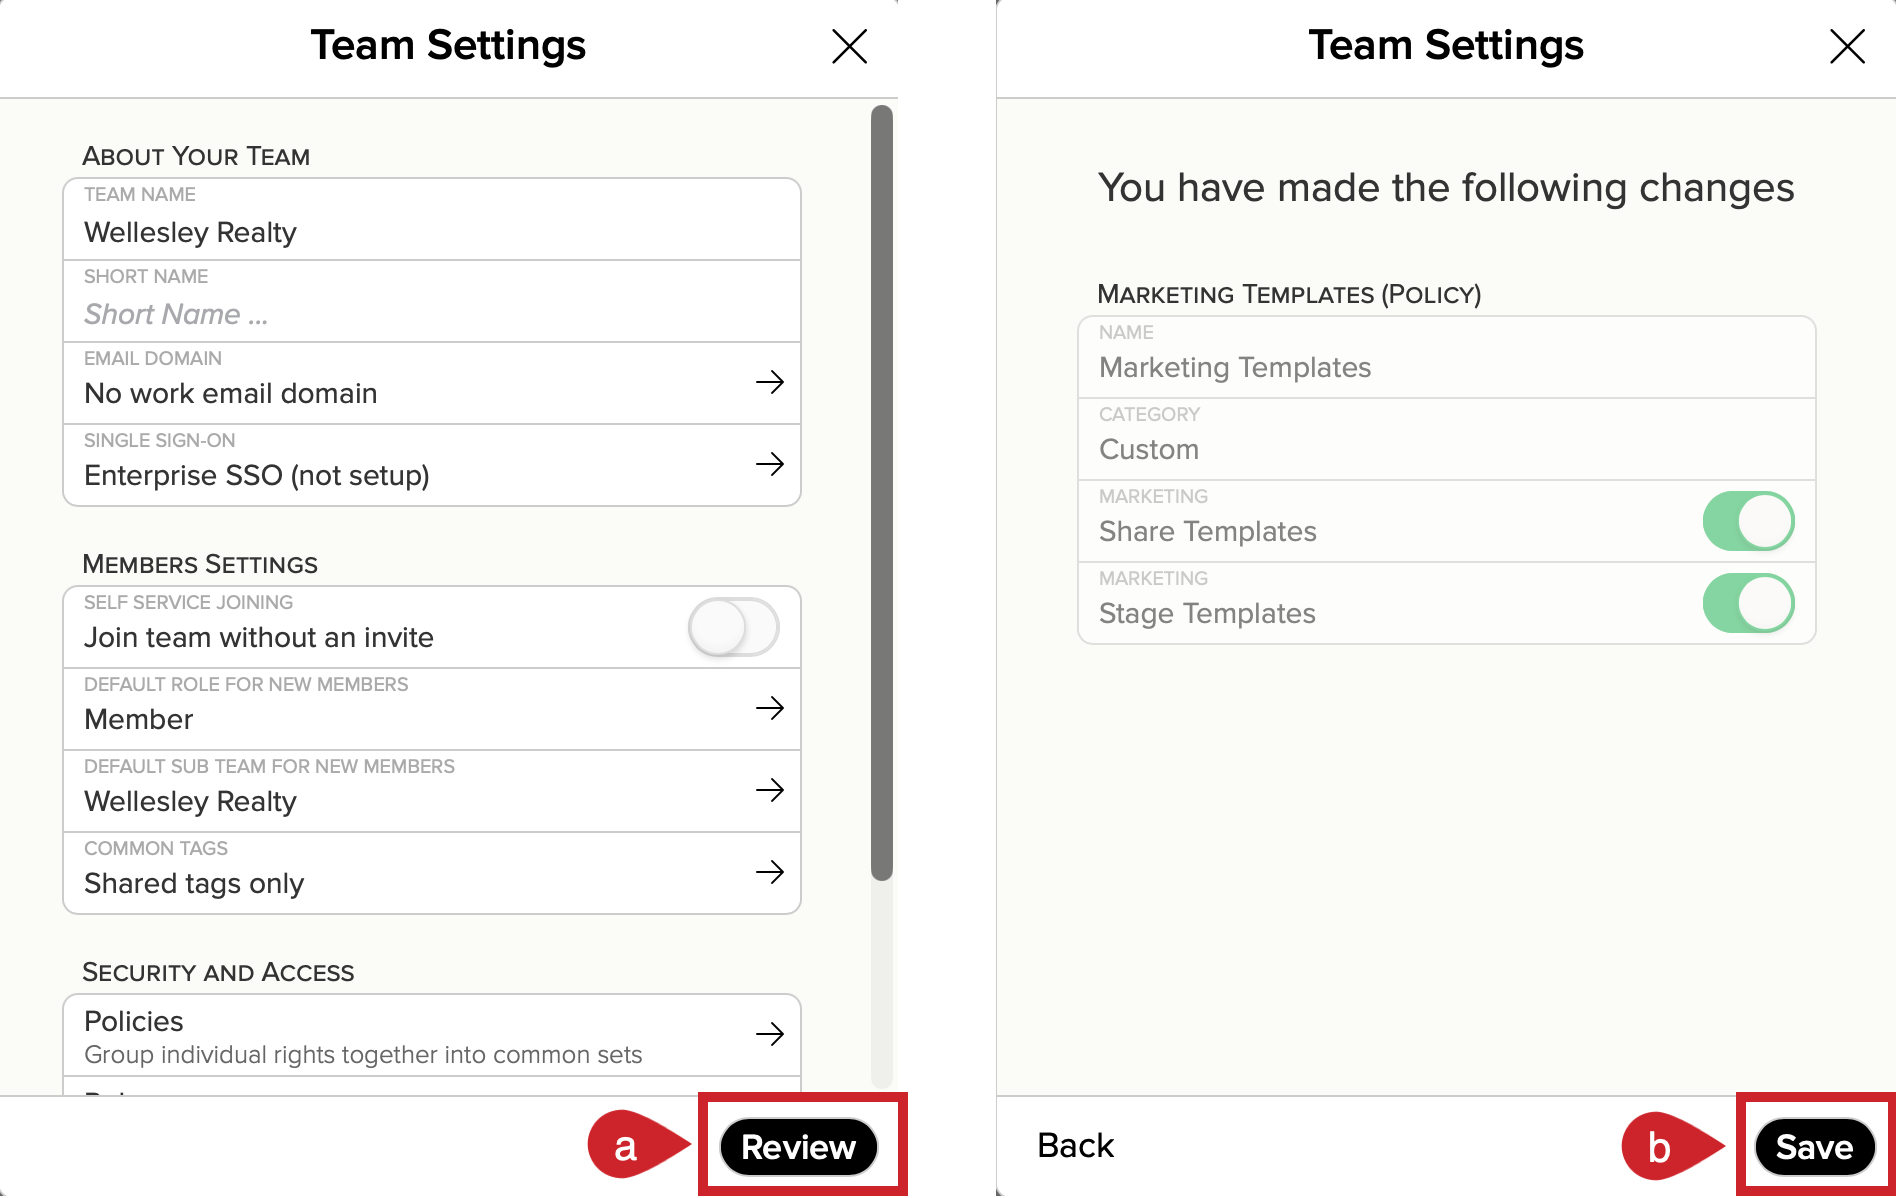
7.) Save the Policy:
- Tap on Review.
- Tap on Save.
Apply the Policy to a User (or Users)
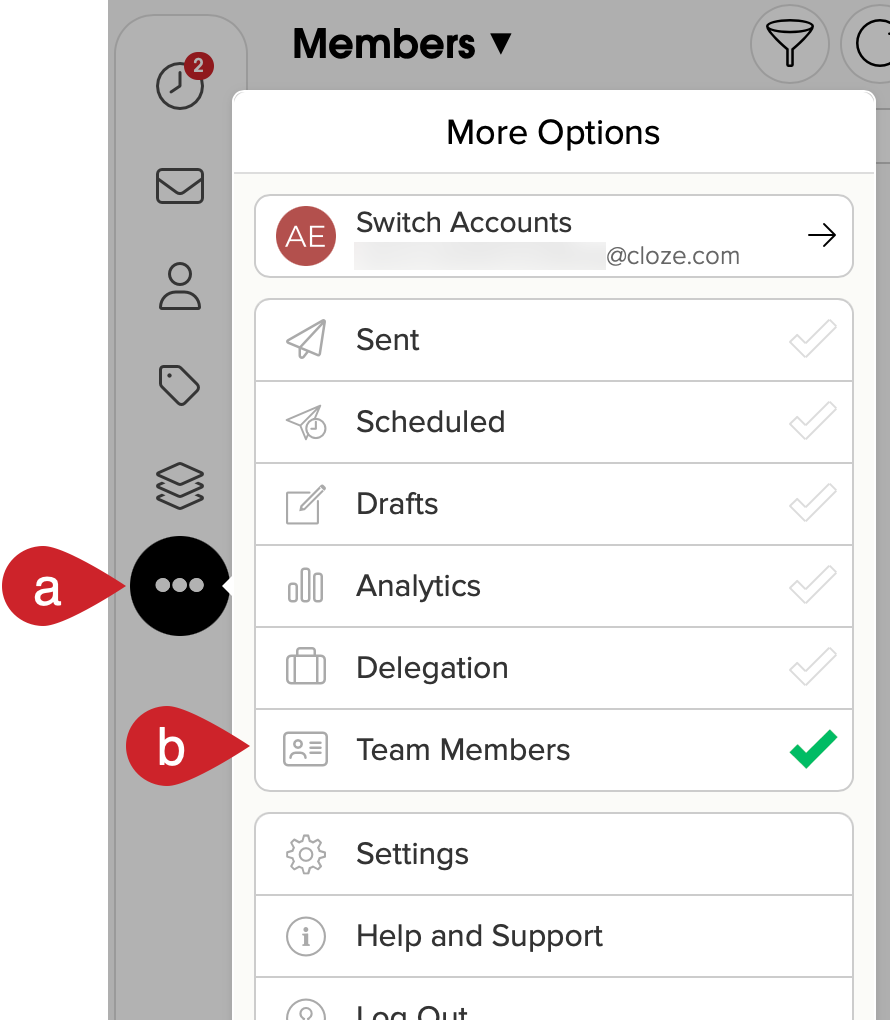
1.) In the admin account:
- Tap on More in the lower left on your computer (cloze.com).
- Tap on Team Members.
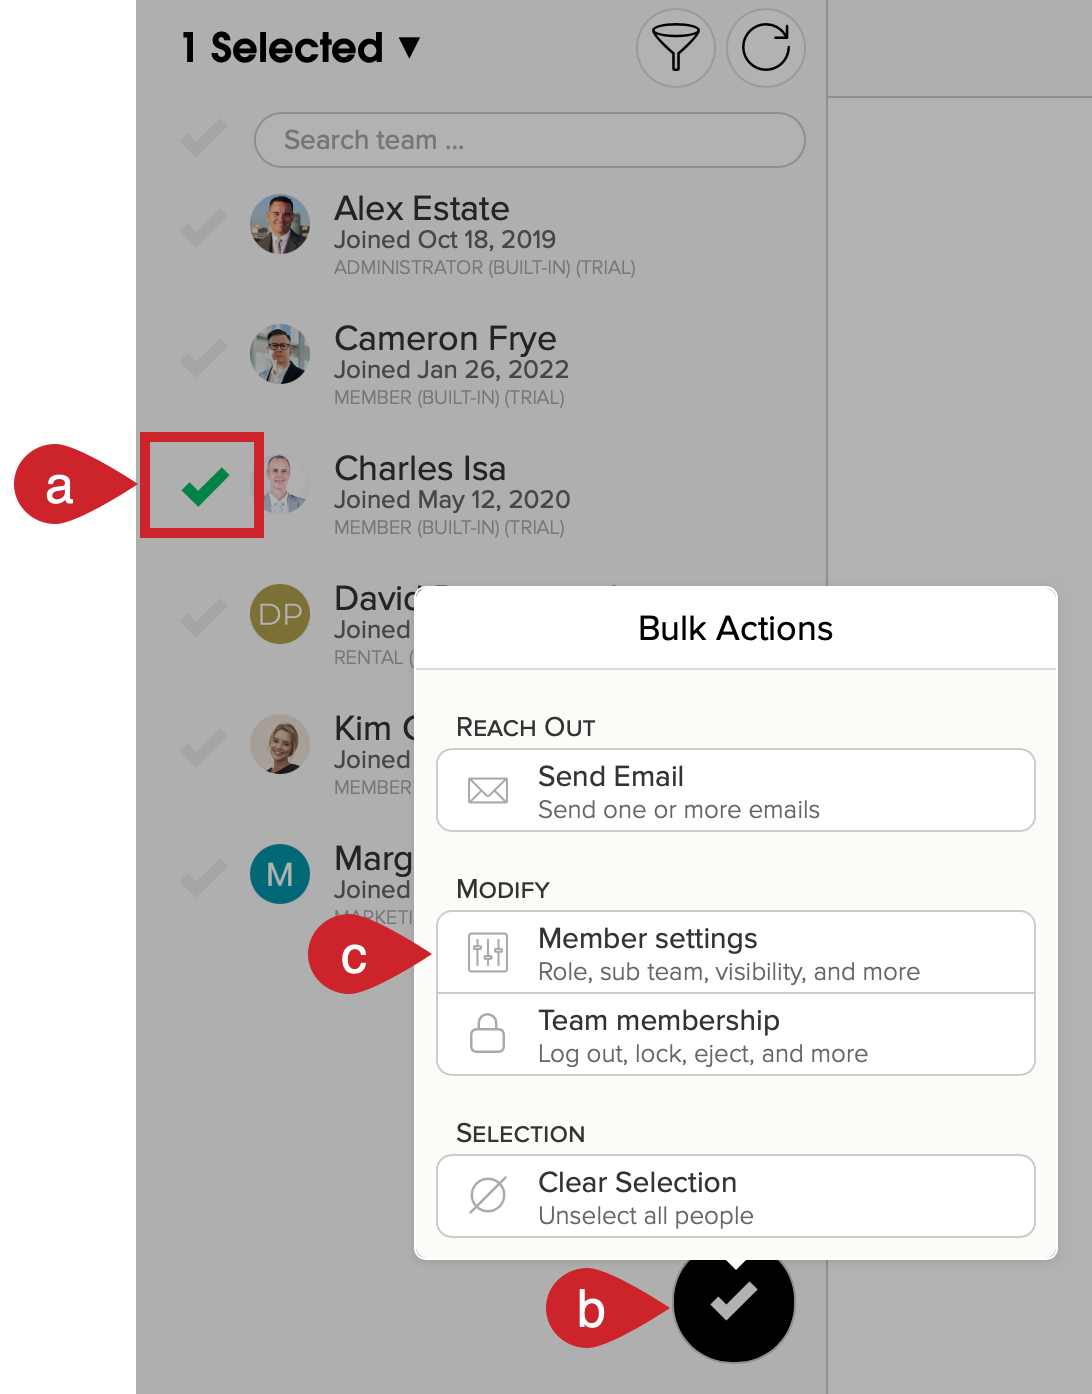
2.) In the team member section:
- Select a team member.
- Tap the large checkmark at the bottom to open the Bulk Actions menu.
- Tap on Member Settings.
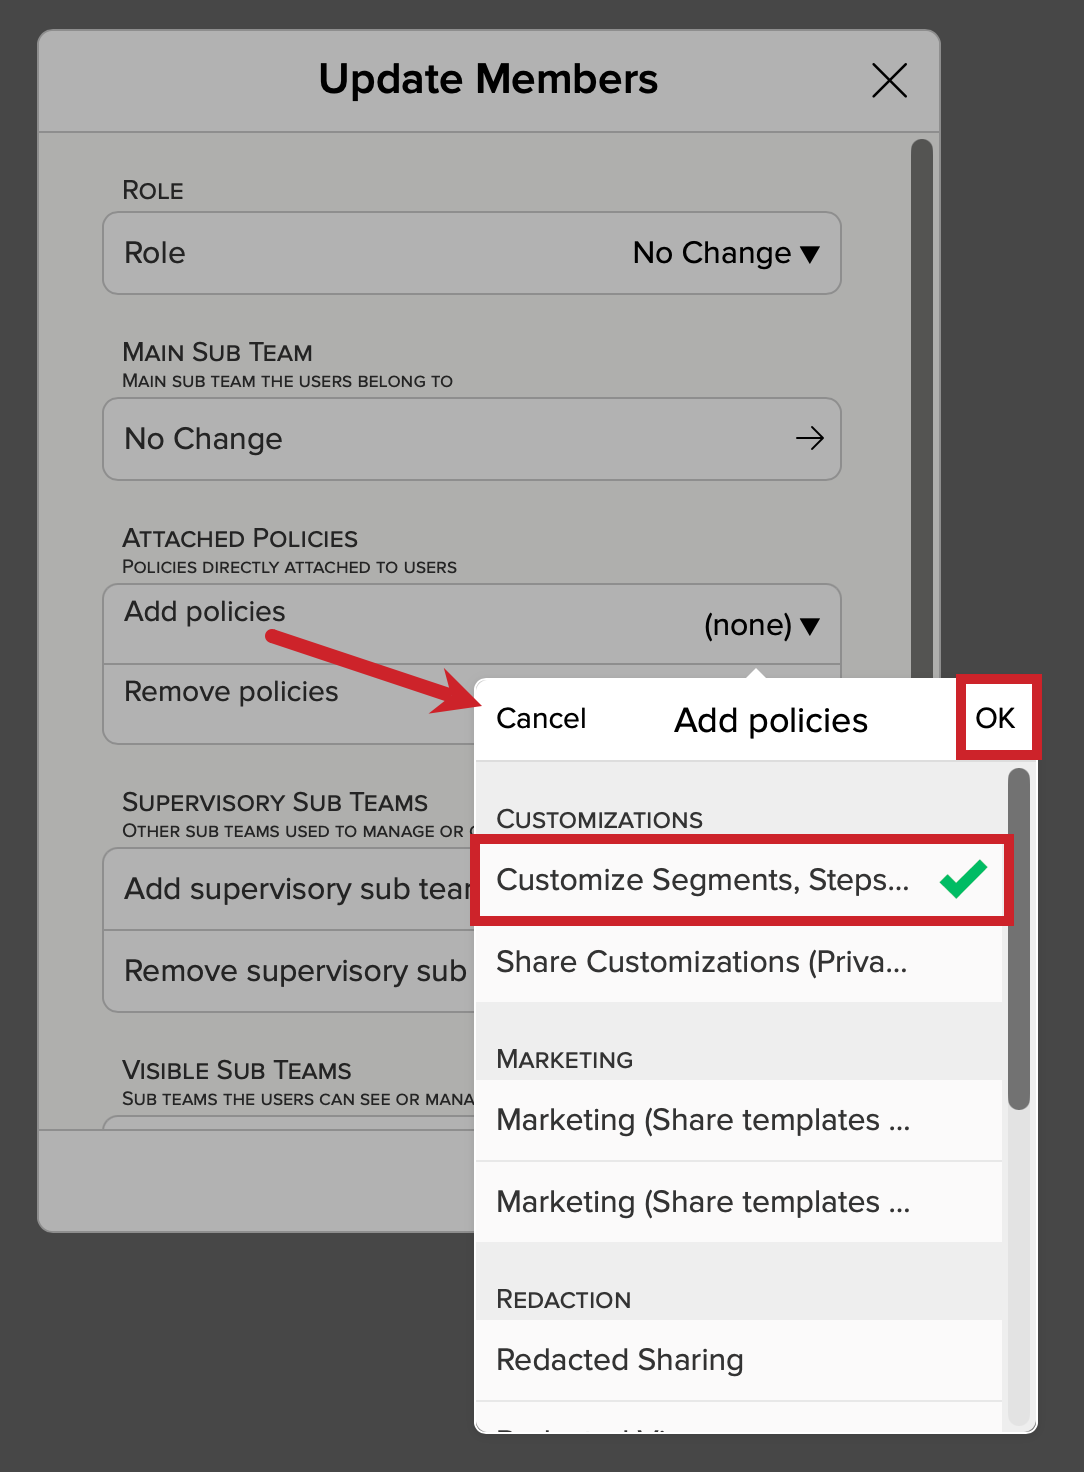
3.) Next to Add policies, tap the dropdown menu and select the policies you want to apply. Tap OK.
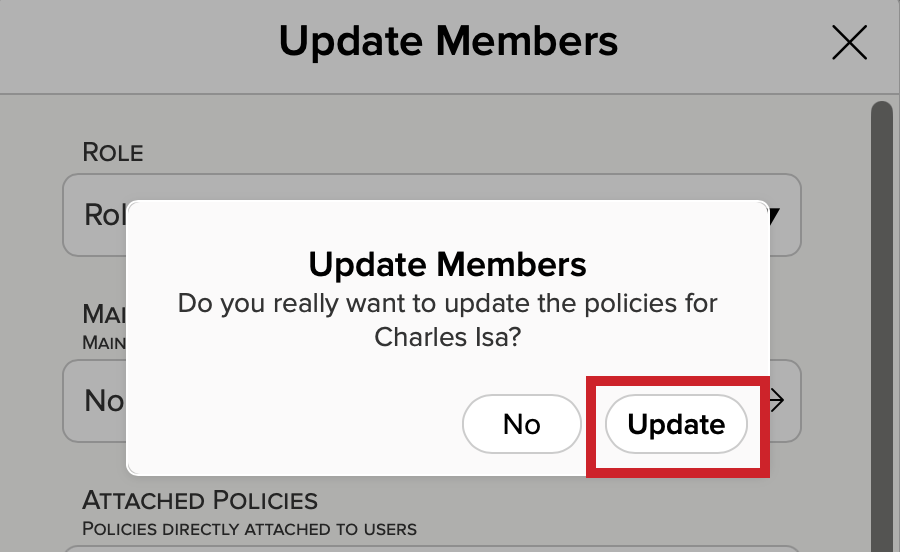
4.) Tap on Update and confirm you want to update the policies.