How do I sync calls and texts with Cloze using iCloud? [BETA]
Please note that this new syncing option is in beta. There are a few extra steps below because it is in beta, but once you have it set up, syncing is much easier and faster.
If you have a Mac computer you can now sync your calls and texts to Cloze using iCloud instead of connecting to your iPhone. With this syncing option, you no longer need to connect over Wi-Fi or use a cable to sync your iPhone calls and texts with Cloze. And, you no longer have to enter your passcode each time a sync runs.
There are a few steps to walk through to switch you over, but once you have switched your calls and texts will sync automatically in the background. Please walk through these steps in order.
- Follow the preparation steps outlined here. If you have completed these steps, skip to the instructions below.
- Install the new Call and Text Sync app with iCloud syncing.
1.) Install the new Call and Text Sync app with iCloud syncing
If you are unsure what type of computer chip you have, select the Intel option or check by what type of chip you have.
- Tap on the Apple icon in the upper left corner of your Mac computer screen.
- Select About this Mac.

- Look to see what type of chip is listed.
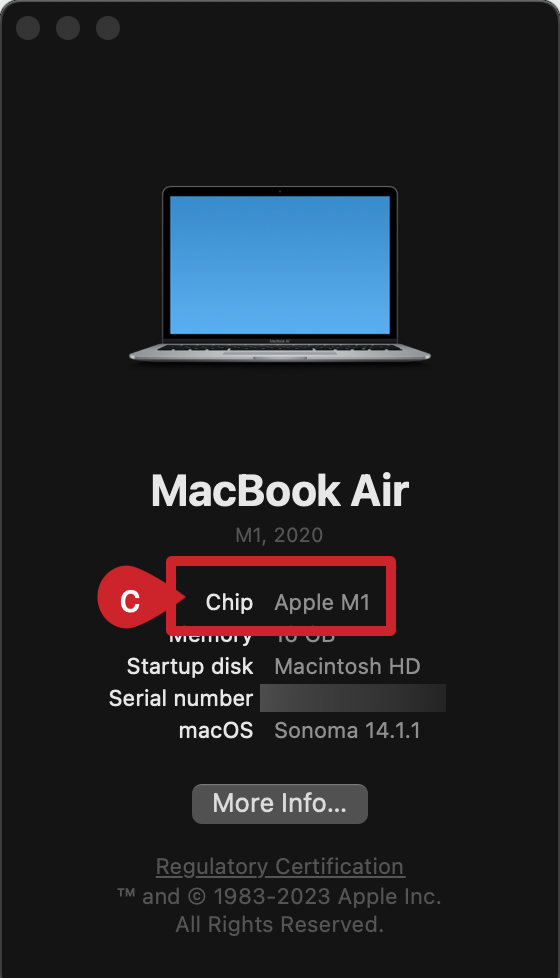
- Based on the type of chip you see listed for your computer, click on the appropriate link below to download the Cloze Call and Text Sync App with iCloud syncing.
2.) Locate the file in your downloads folder and double-click it.
- Navigate to the Downloads folder
- Double-click on the Cloze+Call+and+Text+Sync.dmg file

3.) Drag the app icon into the Applications folder and run it.
- Drag the Cloze Call and Text Sync app into the Applications folder.

- Navigate to the application folder and double-click on the Cloze Call and Text Sync app.

4.) Walk through the steps to complete the setup.
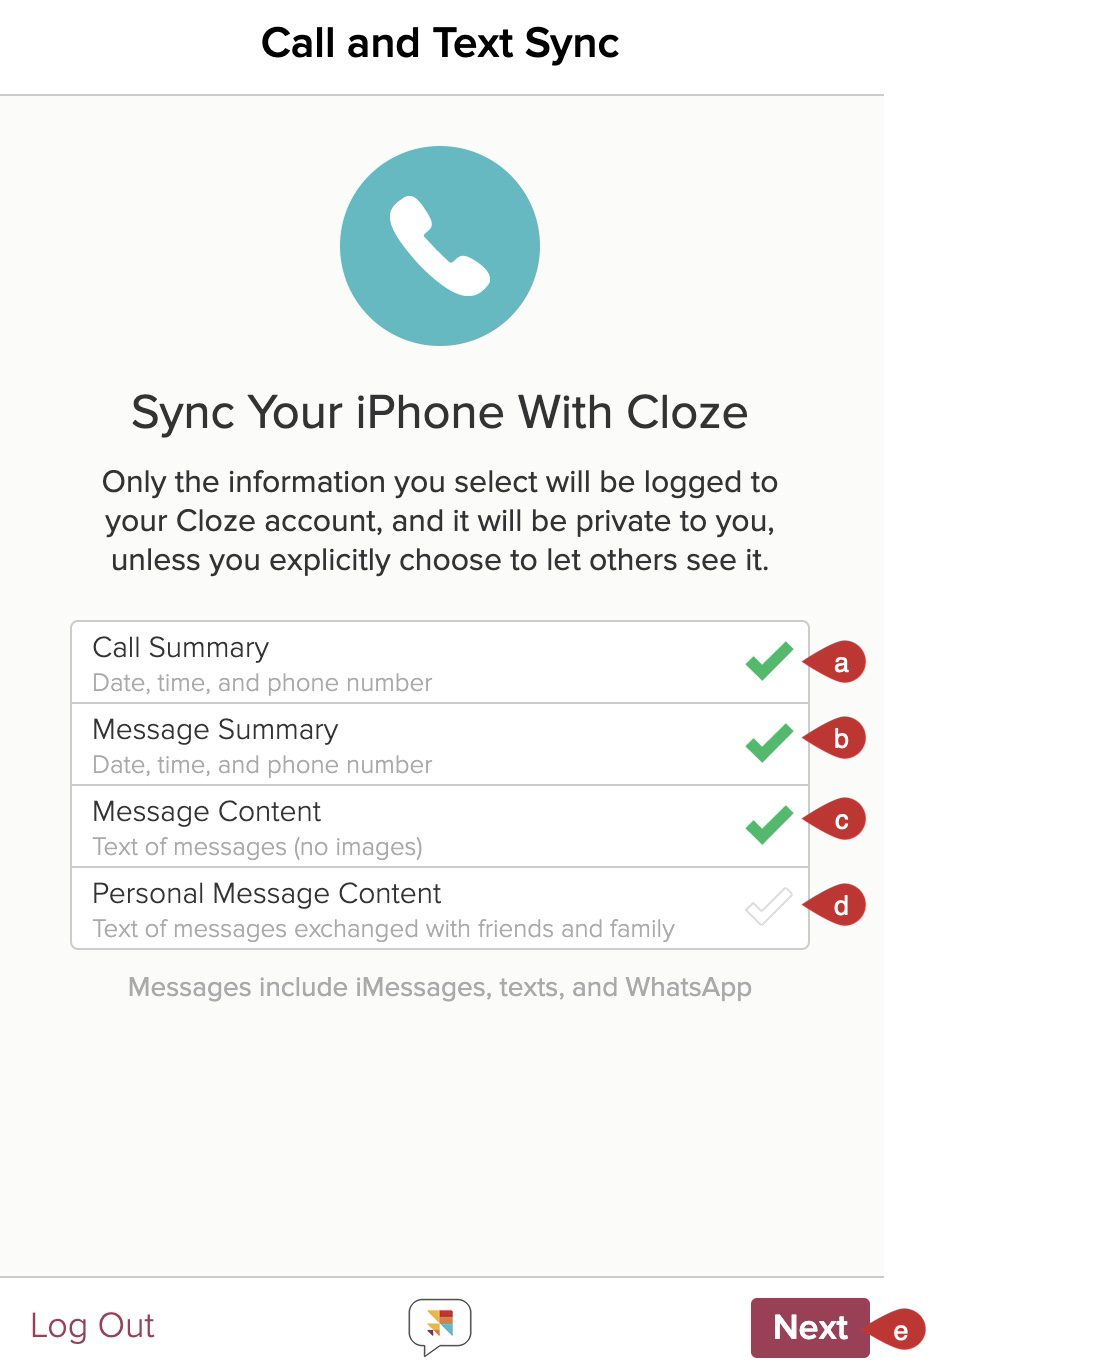
Select the options you would like to see logged in Cloze.
- Call Summary - Log the date, time, and phone number of a phone call.
- Message Summary - Log the date, time, and phone number of a message.
- Message Content - Log message content in Cloze. Note that images, videos, and documents are not stored.
- Personal Message Content - If you'd prefer not to store message content from friends or family (contacts who are organized with a Personal Segment) in Cloze you can leave this unchecked. You can change this setting later if you wish.
- When you are done, tap on the Next button.
Next, you will adjust or confirm several settings on both your iPhone and Mac computer.
- iPhone - start with your iPhone and walk through the three settings that need to be adjusted or confirmed.
- Mac - then move to your Mac and adjust the four required settings.
You will find detailed instructions for each setting below. Be sure to check off each item as you complete it.

iPhone Settings
Make these changes on your iPhone.
Navigate to Settings on your iPhone by tapping on the Settings icon. You can stay in the settings app for iPhone-related settings changes.

Text Message Forwarding

- Open the Settings app

- Tap on Messages

- Tap on Text Message Forwarding

- Toggle on your Mac

Calls on Other Devices

- Open the Settings app
- Tap on Phone

- Calls on Other Devices

- Allow Calls on Other Devices
- Toggle on your Mac

Wi-Fi Calling

- Open the Settings app
- Tap on Phone
- Tap on Wi-Fi Calling

- Toggle on Add Wi-Fi Calling for Other Devices
 Mac Settings
 Mac Settings
Now that you have completed the iPhone settings changes, you can move on to your Mac settings. Make the changes below on your Mac.
Enable Full Disk Access
- Click on Full Disk Access. This will bring you directly to the Full Disk Access settings section to toggle on Cloze Call and Text Sync.

- Toggle ON Cloze Call and Text Sync

- When you enable full disk the Cloze Call and Text Sync app will need to be restarted

- The app will restart and then you can continue with "Enable Messages in iCloud"
Enable Messages in iCloud

Instructions are also available from Apple Support.
- Open the Messages app on your Mac

- Tap on Messages
- Select Settings

- Tap on iMessage
- Enable Messages in iCloud

Enable FaceTime Calls

- Open the FaceTime app on your Mac

- Tap on FaceTime.
- Select Settings.

- Confirm the Apple ID matches the same Apple ID your iPhone uses.

- Enable this account.

Enable Wi-Fi Calls

- Open the FaceTime app on your Mac.
- Tap on FaceTime.
- Select Settings.
- If you see an Upgrade to Wi-Fi Calling button, click it and follow the instructions.
You can skip this step if you don't see the Upgrade to Wi-Fi Calling button.

Complete the setup
- Click on the Next Button

- Enter your phone number

- Click on the OK button.

- You are done! Your messages and calls will start syncing. The full will sync will take 15-20 minutes (sometimes longer if you have a lot of messages). You can close the window.
Messages and calls will sync in the background automatically in the background.

Optionally, if you use WhatsApp please make sure to install WhatsApp on your Mac.
Install WhatsApp on your Mac

If you would like to automatically track WhatsApp calls and texts, the WhatsApp desktop app needs to be installed and running on your Mac. Once installed and running Cloze will track your calls and texts automatically.
Click here to download and install the WhatsApp app for Mac.