How do I add Custom Fields to contacts I import?
When importing contacts with a CSV or Excel file, you can also include Custom Fields.
Custom Fields are available in all stages within a single segment. They let you further classify your People, Companies, and Projects (or Deals)—for example, by Type, Role, Department, or Lead Source, plus any custom fields you create.
When enabled, custom fields appear in the Relationship section for People and Companies, and in the Status section for Projects or Deals. Please read more about Custom Fields here.

Note: The easiest way to create a custom import template is to export it from your Cloze account. Your template will include all your existing Custom Fields, which appear as columns starting with “Custom” followed by the field name. You can add values for each field in the rows below.
Click below to download your customized template anytime you add or update Custom Fields.
- Cloze CSV Import Contacts template
- Cloze CSV Import Companies template
- Cloze CSV Projects, Deals template
Set Up Your Custom Fields in Cloze
In Cloze, set up the custom fields that you want to import. When importing a spreadsheet of data, you will need to have the matching field available in Cloze.
For example, if you are importing Lead Source data, you will need to make sure you have a "Lead Source" custom field in Cloze with all of the possible sources as values (this would be a picklist):
For example there could be six values:
- Advertisement
- Website
- Trade Show
- PR
- Referral

Prepare your import file
Custom Fields are imported in their own columns, and you can include as many as you need. Each Custom Field can also contain multiple values.
To import these values you will add a column to your spreadsheet called "Custom lead-source". Each cell in that column will then include the field values. Add new columns in your spreadsheet to accommodate each Custom Field. Each Custom Field will have its own column.

If you need help preparing your file reach out to support@cloze.com or review this article for more information on preparing your file for import.
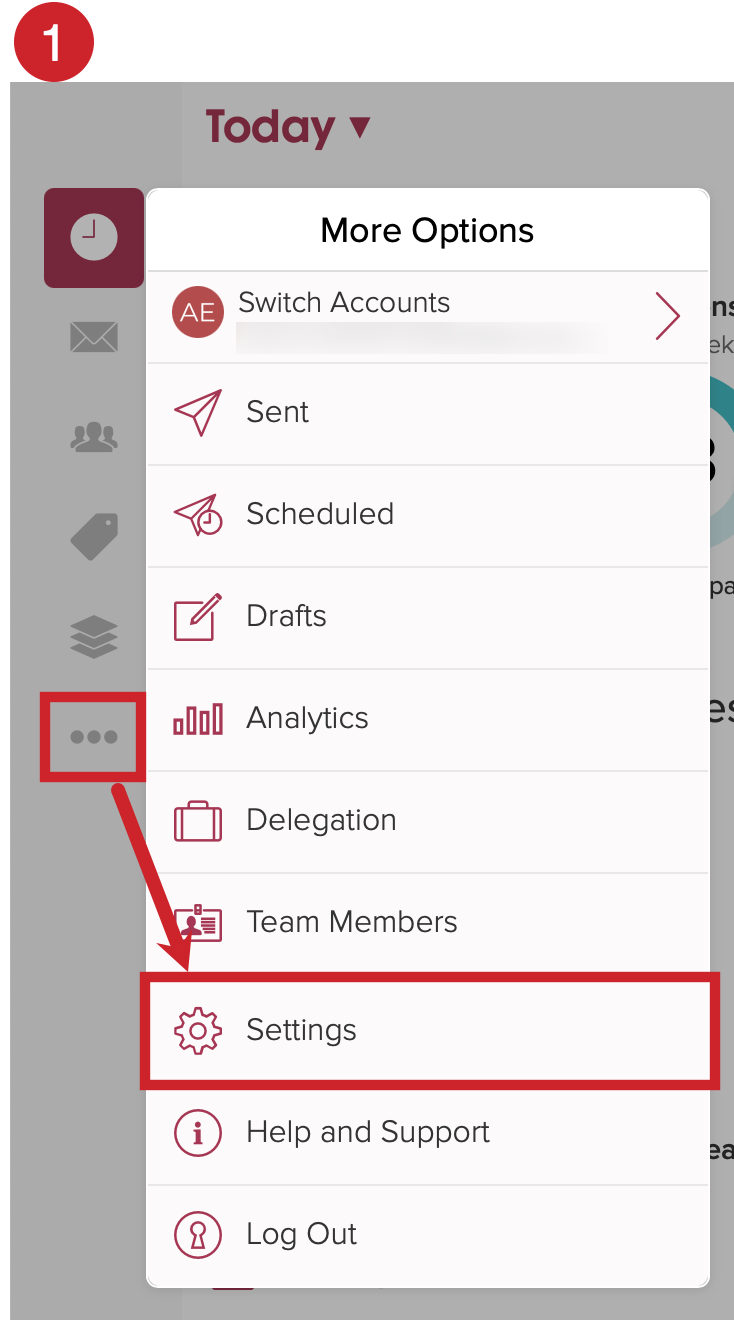
Import your file into Cloze 1.) Tap on More (...) in the lower left of your screen on cloze.com and then tap on Settings.
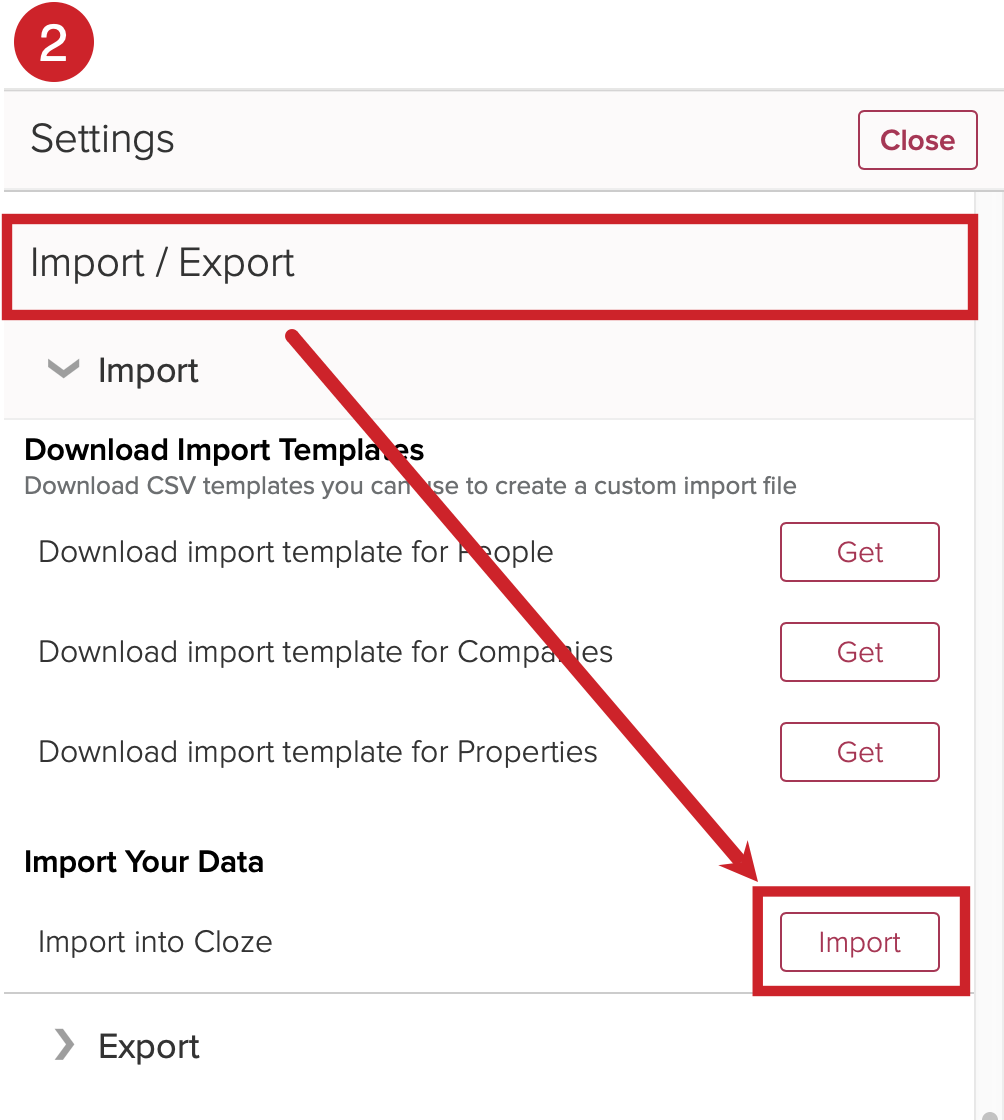
2.) Scroll down to the Import / Export section, click on "Import", and then upload your prepared file.
Using the Cloze Import Mapper
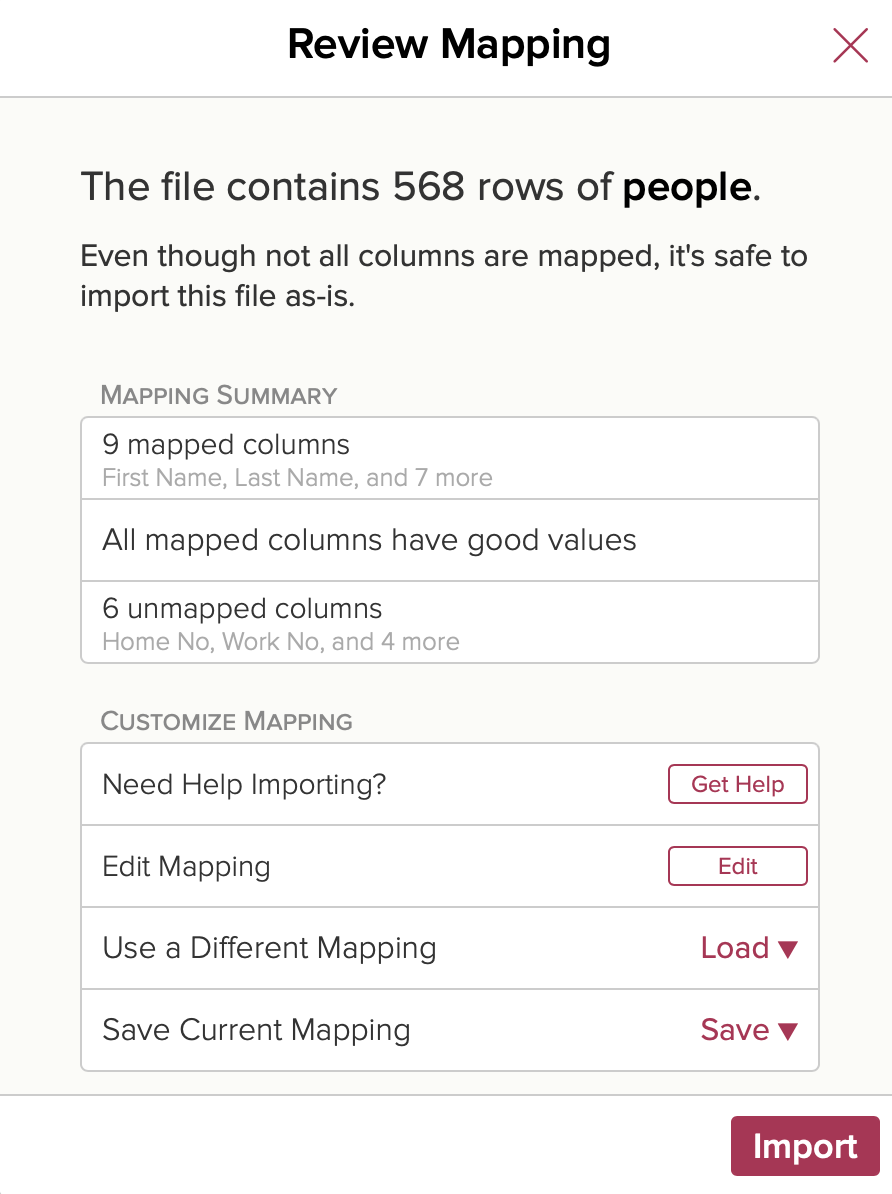
Mapping Summary
- Mapped columns - click to review columns that are mapped and ready to import
- Good or bad values - click to review columns with bad values
- Unmapped columns - click to review columns that are not mapped for import
Customize Mapping
- Need Help Importing? - reach out to support team for assistance
- Edit Mapping - make changes to the mapping
- (Advanced) Use a Different Mapping - load another mapping
- Save Current Mapping - save a mapping for use in the future
3.) Tap on Edit.

4.) On the right side, tap on "Mapping for first person".

5.) Scroll down to Custom Fields. Tap on the + and then select Lead Source.

6.) Cloze will have recognized the column "Custom lead-source". If not, you will need to select the column from "Unmapped Columns".
If all of your values map correctly, you will be able to continue with the import. If not, you will see an error. Tap on "Fix Value Mappings".

7.) Resolve any issues with values.

- For any values that are highlighted red, tap on the dropdown menu to match it to a value already in Cloze. If needed, you can also scroll to the bottom and choose "Pass Through" which will add the value but you will not be able to filter on it in Cloze.
- For Default, you can choose to "Pass Through" or fail the row.
8.) After resolving any issues with fields, tap on Done until you return to the "Review Mapping" screen.

9.) Import your file.
Tap on Import and select one of these options:
Dry Run – Runs a validation only. You can preview rejected records and adjust the field mapping before importing. No data is added to Cloze.
Import – Validates and imports your file using the current mapping. Valid records are added to Cloze, and any rejected records can be downloaded afterward.

Once you finish the import, check the Lead Source field for some of the contacts you imported data for. You can also filter the Lead Source field.
