How do I connect my calendar to Cloze?

With your calendar connected to Cloze, every meeting is automatically logged to the timeline of the attendees, and you'll see your meetings on the Cloze Agenda.
See your Meetings on the Cloze Agenda
- Today's Meetings - Cloze integrates with your calendar and creates a briefing document about the attendees. And makes it easy to add notes and to follow up with all of the participants.
- Finished Meetings - Easily follow up and add notes to your finished meetings.
- Upcoming Meetings - Swipe right to reconfirm your upcoming meetings.
Book Meetings from Cloze
- Book meetings - You can schedule meetings from Cloze using your connected Google or Microsoft 365 (Outlook) calendar—no need to jump between apps.
- Zoom - Include Zoom meeting information if you use Zoom.
Connect your Calendar to Cloze
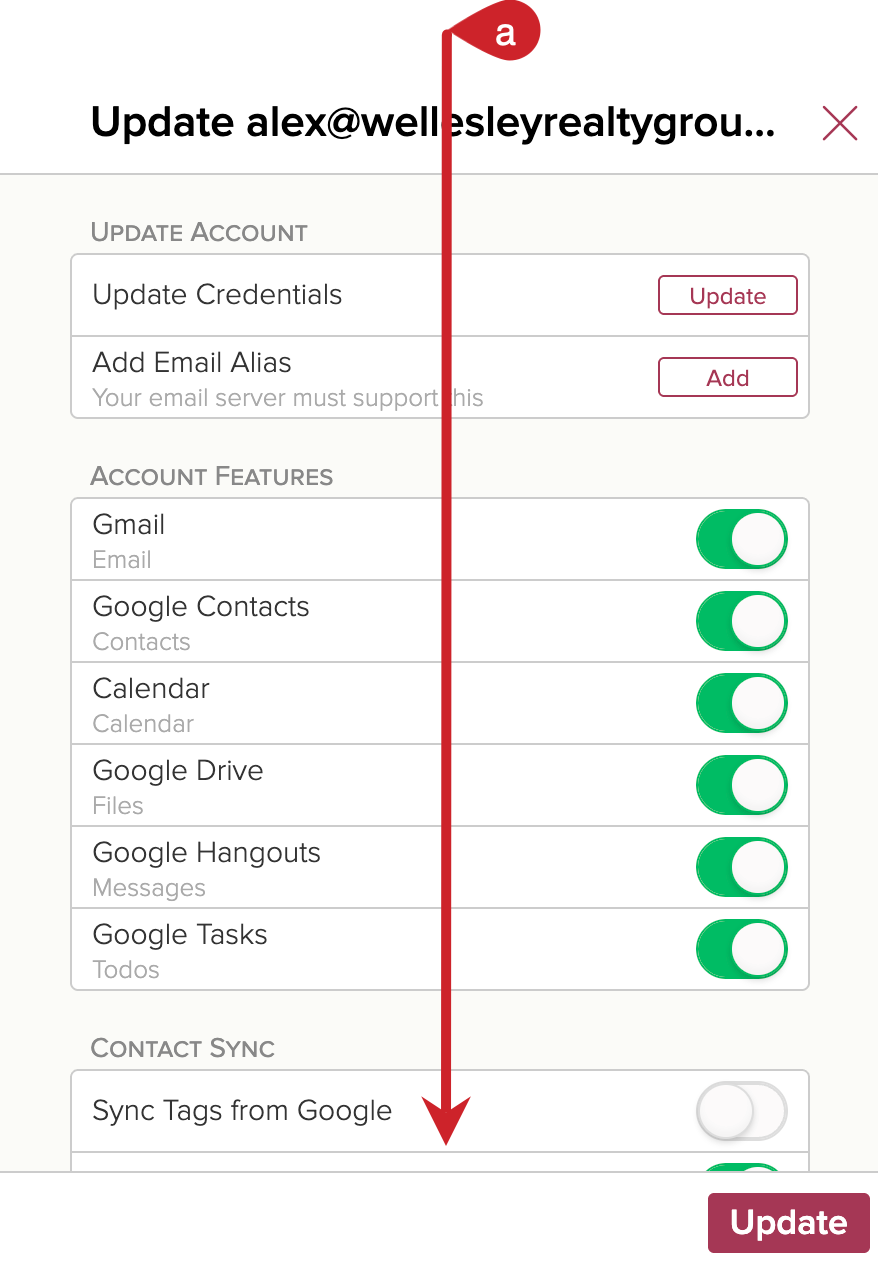
In the Connected Accounts Settings section, you can control the calendars that are displayed in Cloze.
Cloze currently supports Google Calendar, Microsoft Exchange Calendar, Microsoft 365 Outlook Calendar, iCloud Calendar, and Yahoo! Calendars - with more types of calendars coming soon.
👉 For these calendar services, you will need to connect your email first, and then you will see your meetings on the Cloze Agenda and contact profiles.
If you have already connected your email, you can skip to Step 2 below.
Step 1: Connect your Email Account
Step 2: Toggle on or off any calendars as needed
- After connecting your email account, if your calendars aren’t automatically enabled, you can manually turn them on in the Connected Accounts section of your Settings.
- Please follow the instructions below to enable or disable calendars in Cloze.
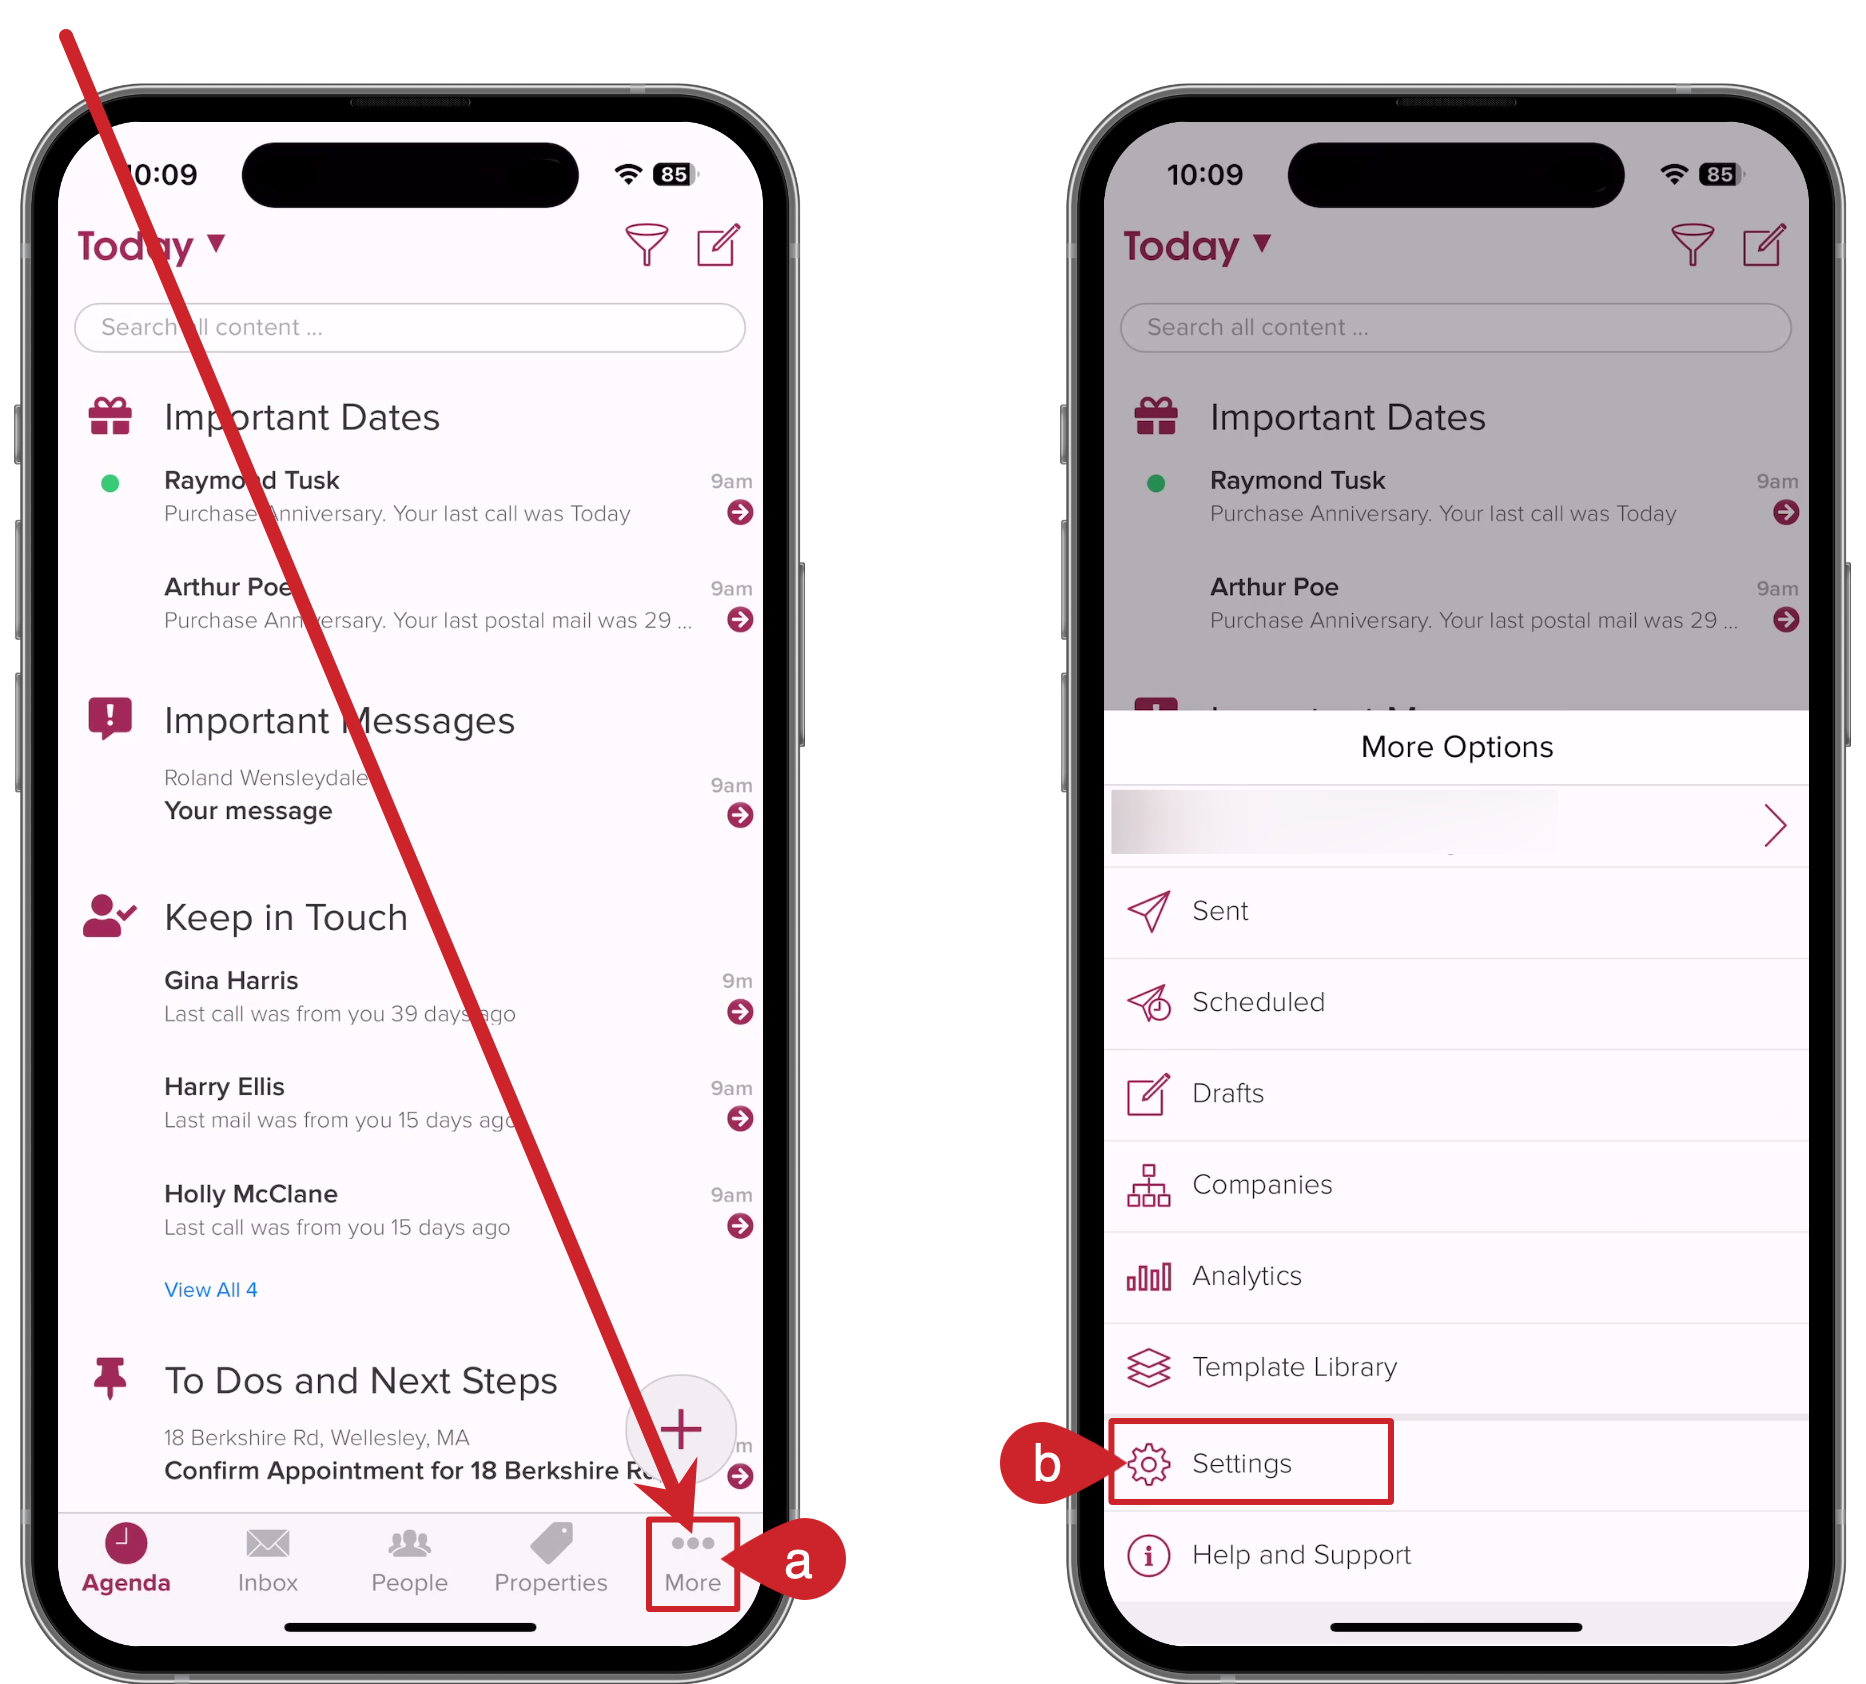
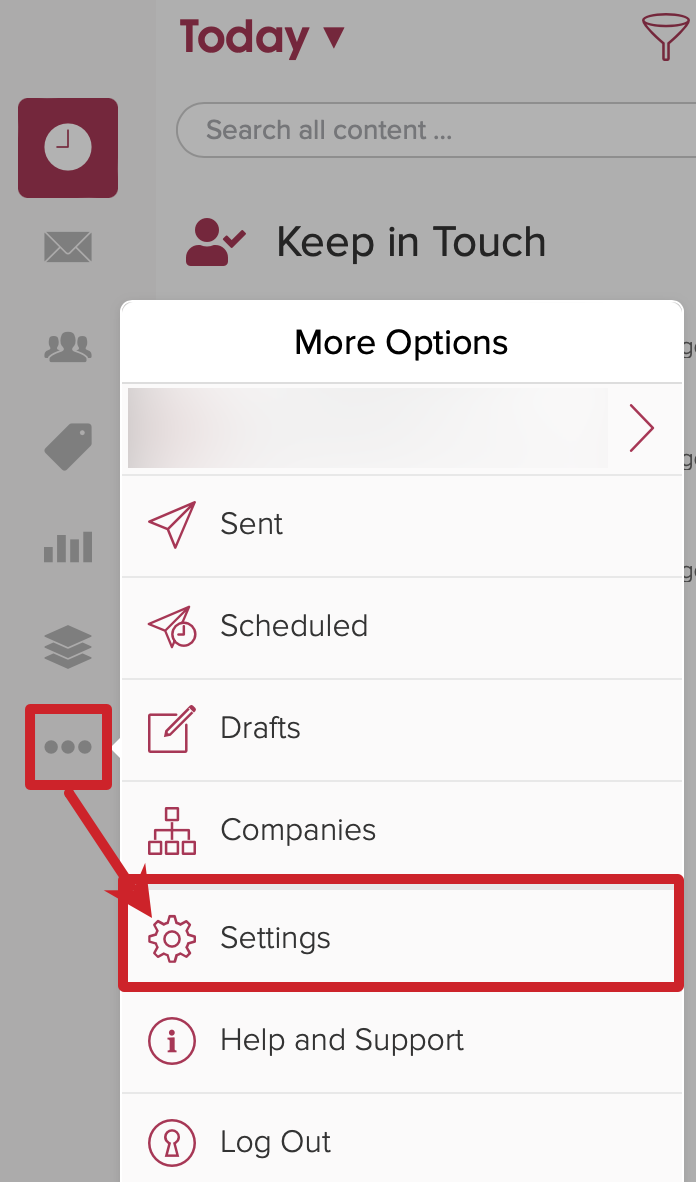
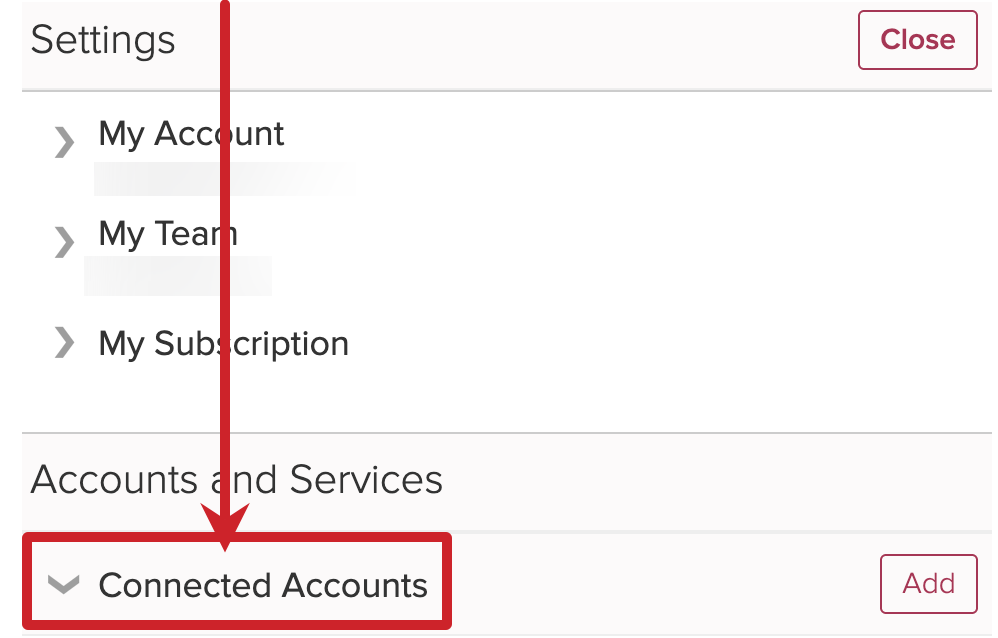
1.) Navigate to Cloze settings by tapping on More and selecting Settings.
Mobile:
- Tap on More in the lower right of your screen on mobile (iOS/Android).
- Select Settings.
On your computer:
- Tap on More in the lower left on your computer (cloze.com).
- Select Settings.
2.) Tap on Connected Accounts to expand the section.
3.) Tap on the gear icon next to each account.
For each connected account, you can tap on the gear icon and enable or disable calendars as needed.

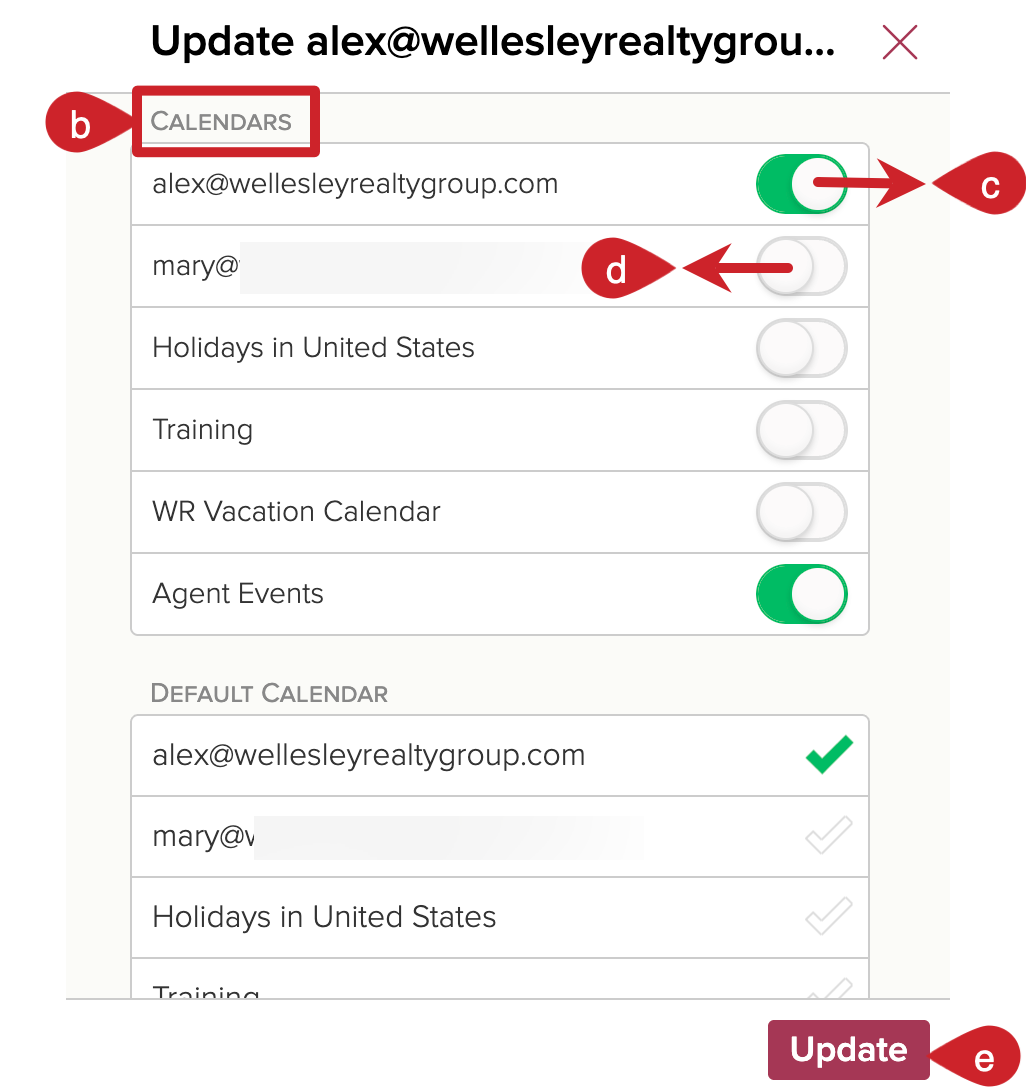
4.) Toggle on or off calendars as necessary.
Scroll down the menu until you see a section labeled Calendars.
- Scroll down the menu.
- Look for the section called Calendars
- Toggle ON Calendars you wish to see in Cloze
- Toggle OFF Calendars you wish to not see in Cloze
- Tap on the Update button when you are done.