Example Campaign: Automatic Saved Search Listing Alerts
The Cloze Campaigns feature is included as part of the Cloze Business Platinum Plan.
GOAL: Automatically send saved search listing alerts
This Campaign is designed to send property listing alerts based on the criteria saved in the Cloze Buyer Profile.

What this campaign does:
- It monitors your local MLS for new listings on the market that match the buyer's criteria
- It automatically sends a beautifully formatted email to the buyer using your real email (Gmail, Office 365, etc.) for better deliverability
- It makes sure not to send the same property twice
How to set a Saved Search in the Buyer Profile
Creating a saved search campaign is as easy. This campaign will "Wait for New Matches" based on the criteria entered in the Cloze Buyer Profile. Cloze will automatically format the email for you.
- Navigate to the buyer in the People section of Cloze.
- Set their criteria and search location in the Buyer Profile
- Start the Saved Search campaign to start sending listing alerts
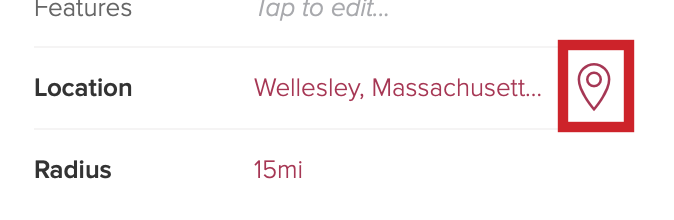
Enter in the key aspect of the saved search like bedrooms, bathrooms, price, and features.

Enter the location of the saved search - You can set a city/town (radius search), ZIPcode (or multiple), or tap on the location icon to draw on a map.
1.) Design your listing alert email
Navigate to the Library and tap on the "Market Emails - Mail Re" category.
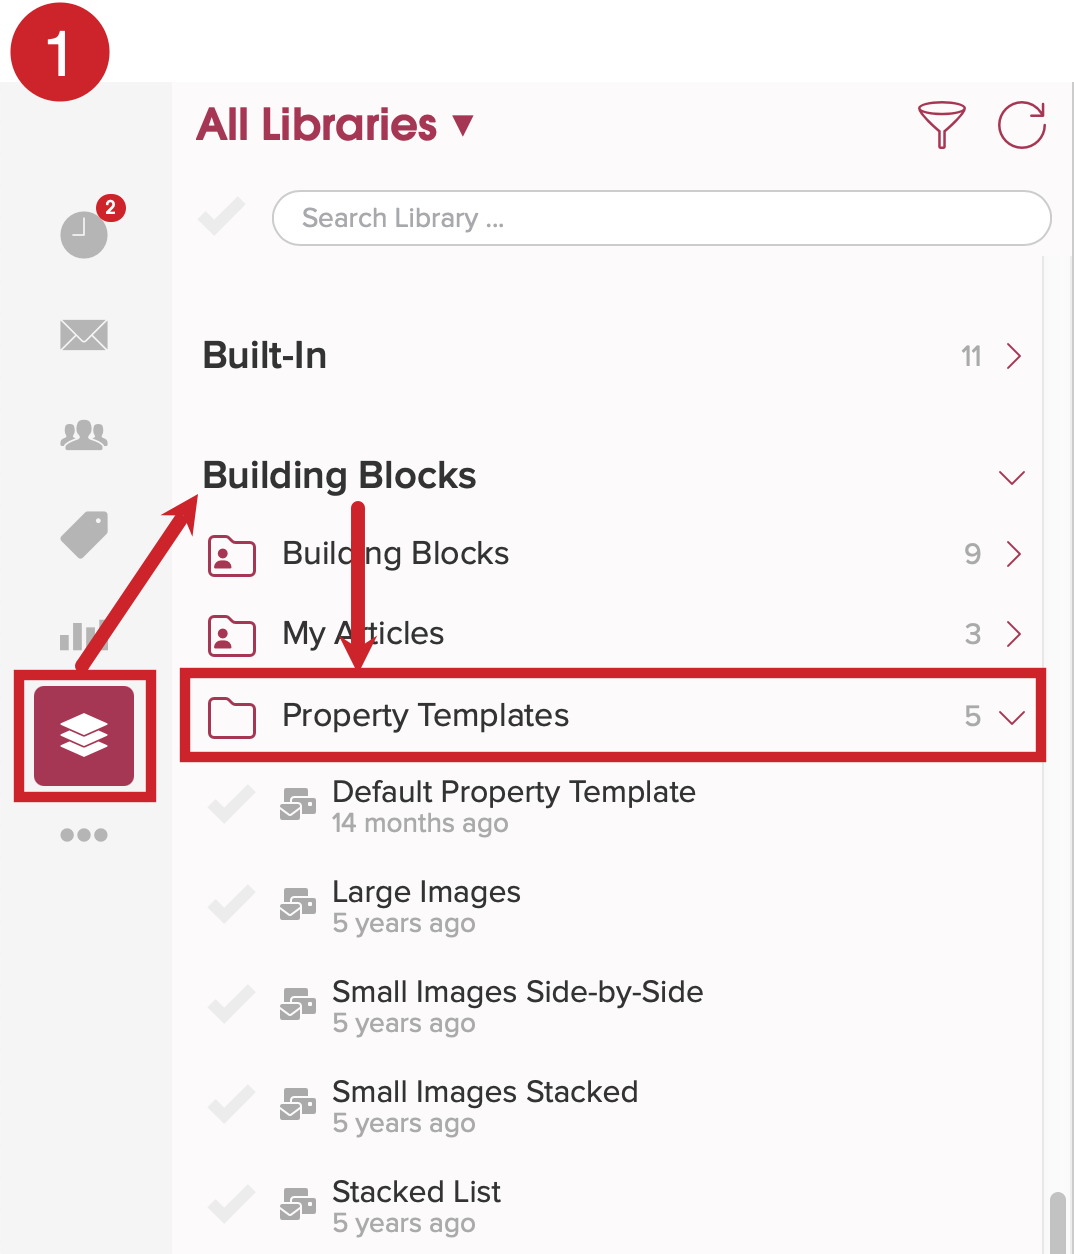
Select one of the default templates as a starting point for your listing alert email and then copy it.
There are 4 default property matching templates you can pick from:
- Default Mail Re Template
- Large Images
- Small Images Side-by-Side
- Small Images Stacked

After selecting your template, tap on the Copy icon.

Personalize the template as needed.
- Customize the subject of the email.
- Toggle ON Personal Intro to add a personalized note to your email.

2.) Navigate to the Cloze Library to create the Campaign
Here are step-by-step instructions on how to create a Campaign.

3.) Design your Campaign
Below you will find the same steps used in the picture above. In italics, in the right column, you will find the specific type of step used and link with additional instructions.
|
|
Step Name | Campaign Step
|
| 1.) | Wait for new matches | Use Wait for New Matches |
| 2.) | Automatically Send "Saved Search" Email | Use Auto Send Email |
| 3.) | Go to Start of Campaign* | Use Repeat from Start of Campaign
|
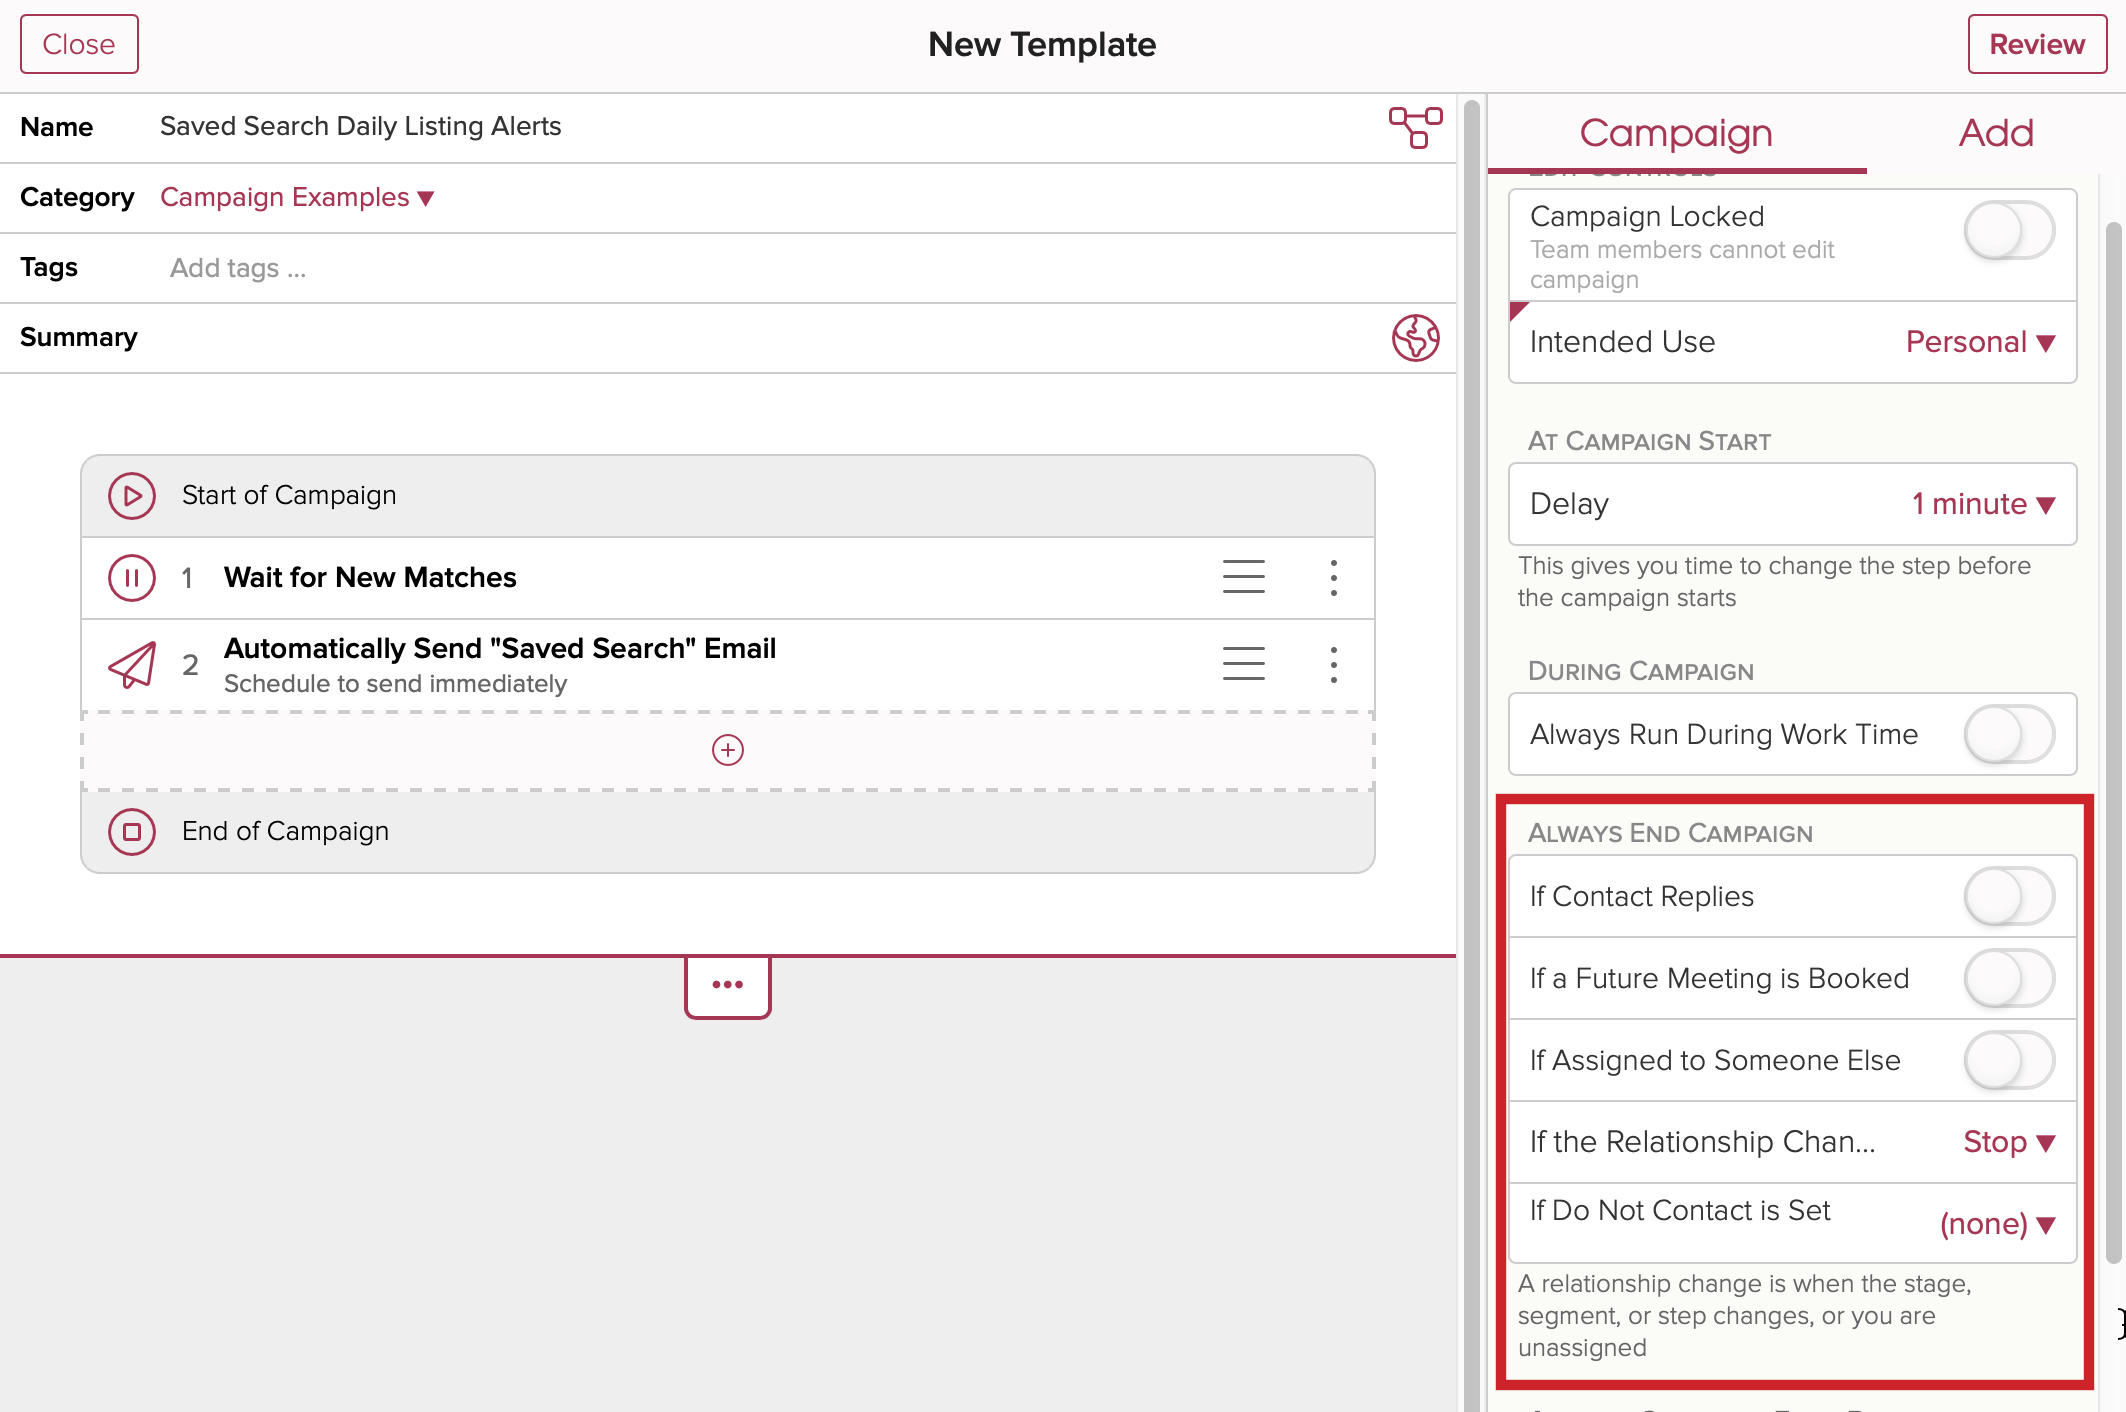
Recommended Settings
Campaign Settings
Set when you would like the daily listing alert to stop running. In this example, if the relationship changes (Stage, Segment, Tag), the campaign will end.
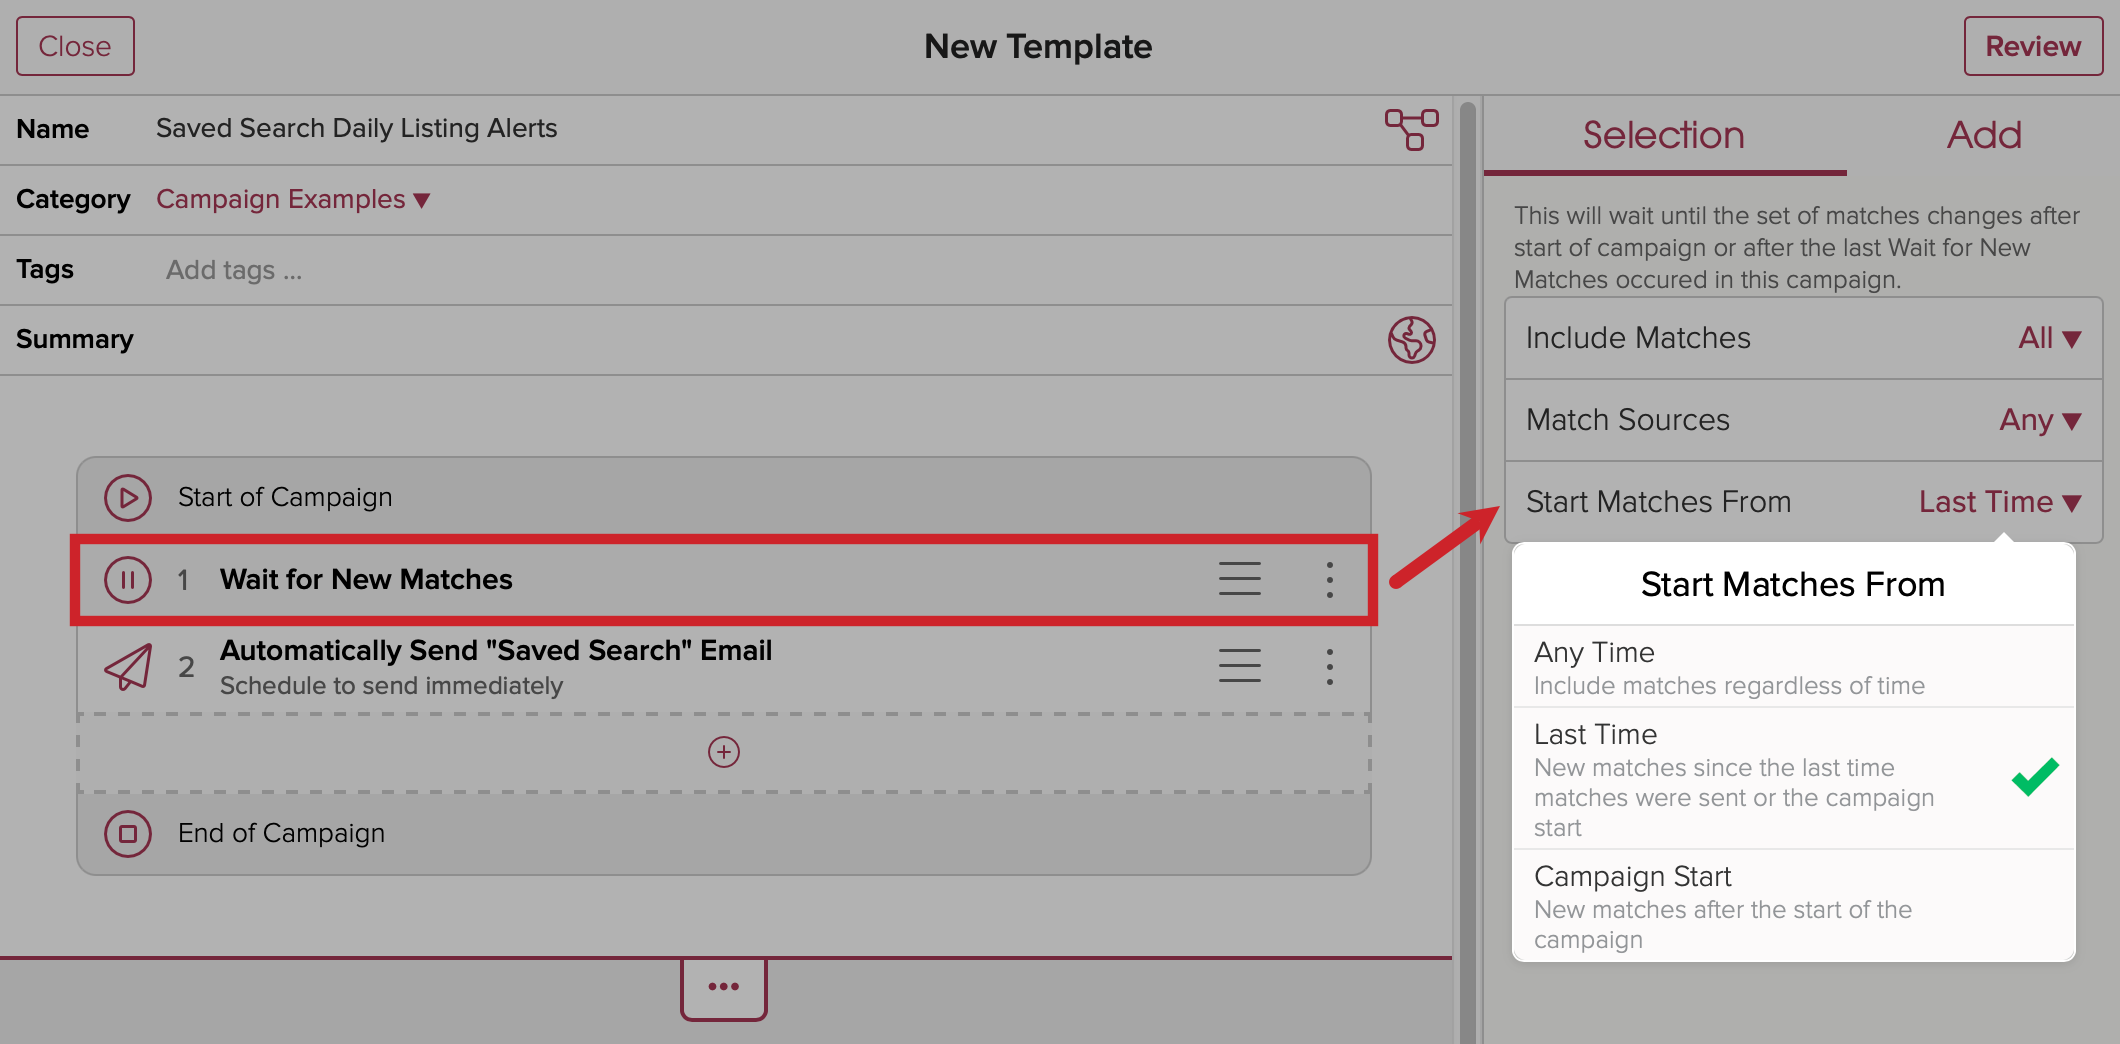
Wait for New Matches Settings
Set when to include matches. Tap on the step "Wait for New Matches" and then adjust the settings on the right.
Auto Send Email Settings
Adjust the settings for your listing email. Tap on the step to select it and then scroll down to "Include Matches". Adjust the setting for what to include in each listing alert email.

Add a trigger to your campaign.
Once you have created the Campaign you can link it to the Next Step of your choice in Settings or start the campaign on any contact of your choice.
Test your Campaign
Next, we recommend that you test your campaign.
Here are step-by-step instructions on how to test your campaigns. We also recommend reviewing these best practices to help avoid any accidental trouble.